Purpose/Overview
The Check Log feature allows users to group payment records into a single processing batch for review and approval. Users can either select an existing Check Log or create a new one before adding payments. This feature helps organize payment processing, supports approval workflows, and ensures payments are tracked efficiently before submission.
Navigation Path:
To access this feature: Project > Payment Manager > Search Information > Processing Options Panel
Things to Know:
- Multiple payments can be added to the same Check Log.
- Additional payment records can be searched for and added to the Check Log at any time before the Check Log is submitted for approval.
- Once a Check Log is submitted, payment modifications may require the Check Log to be rejected or returned to a pending status, depending on system permissions and workflow configuration.
- Newly created Check Logs are immediately available in the Check Log dropdown list and do not require a page refresh.
Key Benefits/Use Cases:
Organize Payments for Processing
Group related payment records into a single Check Log to simplify payment management and approval activities.
Build Payment Batches Over Time
Users can continue searching for and adding payment records to a Check Log until it is ready for submission.
Support Approval Workflows
Prepare payment batches for review and approval while maintaining a structured audit trail of included payments.
How It Works:
A. Create a New Check Log (Optional)
If a suitable Check Log does not already exist, create a new one before adding payments.
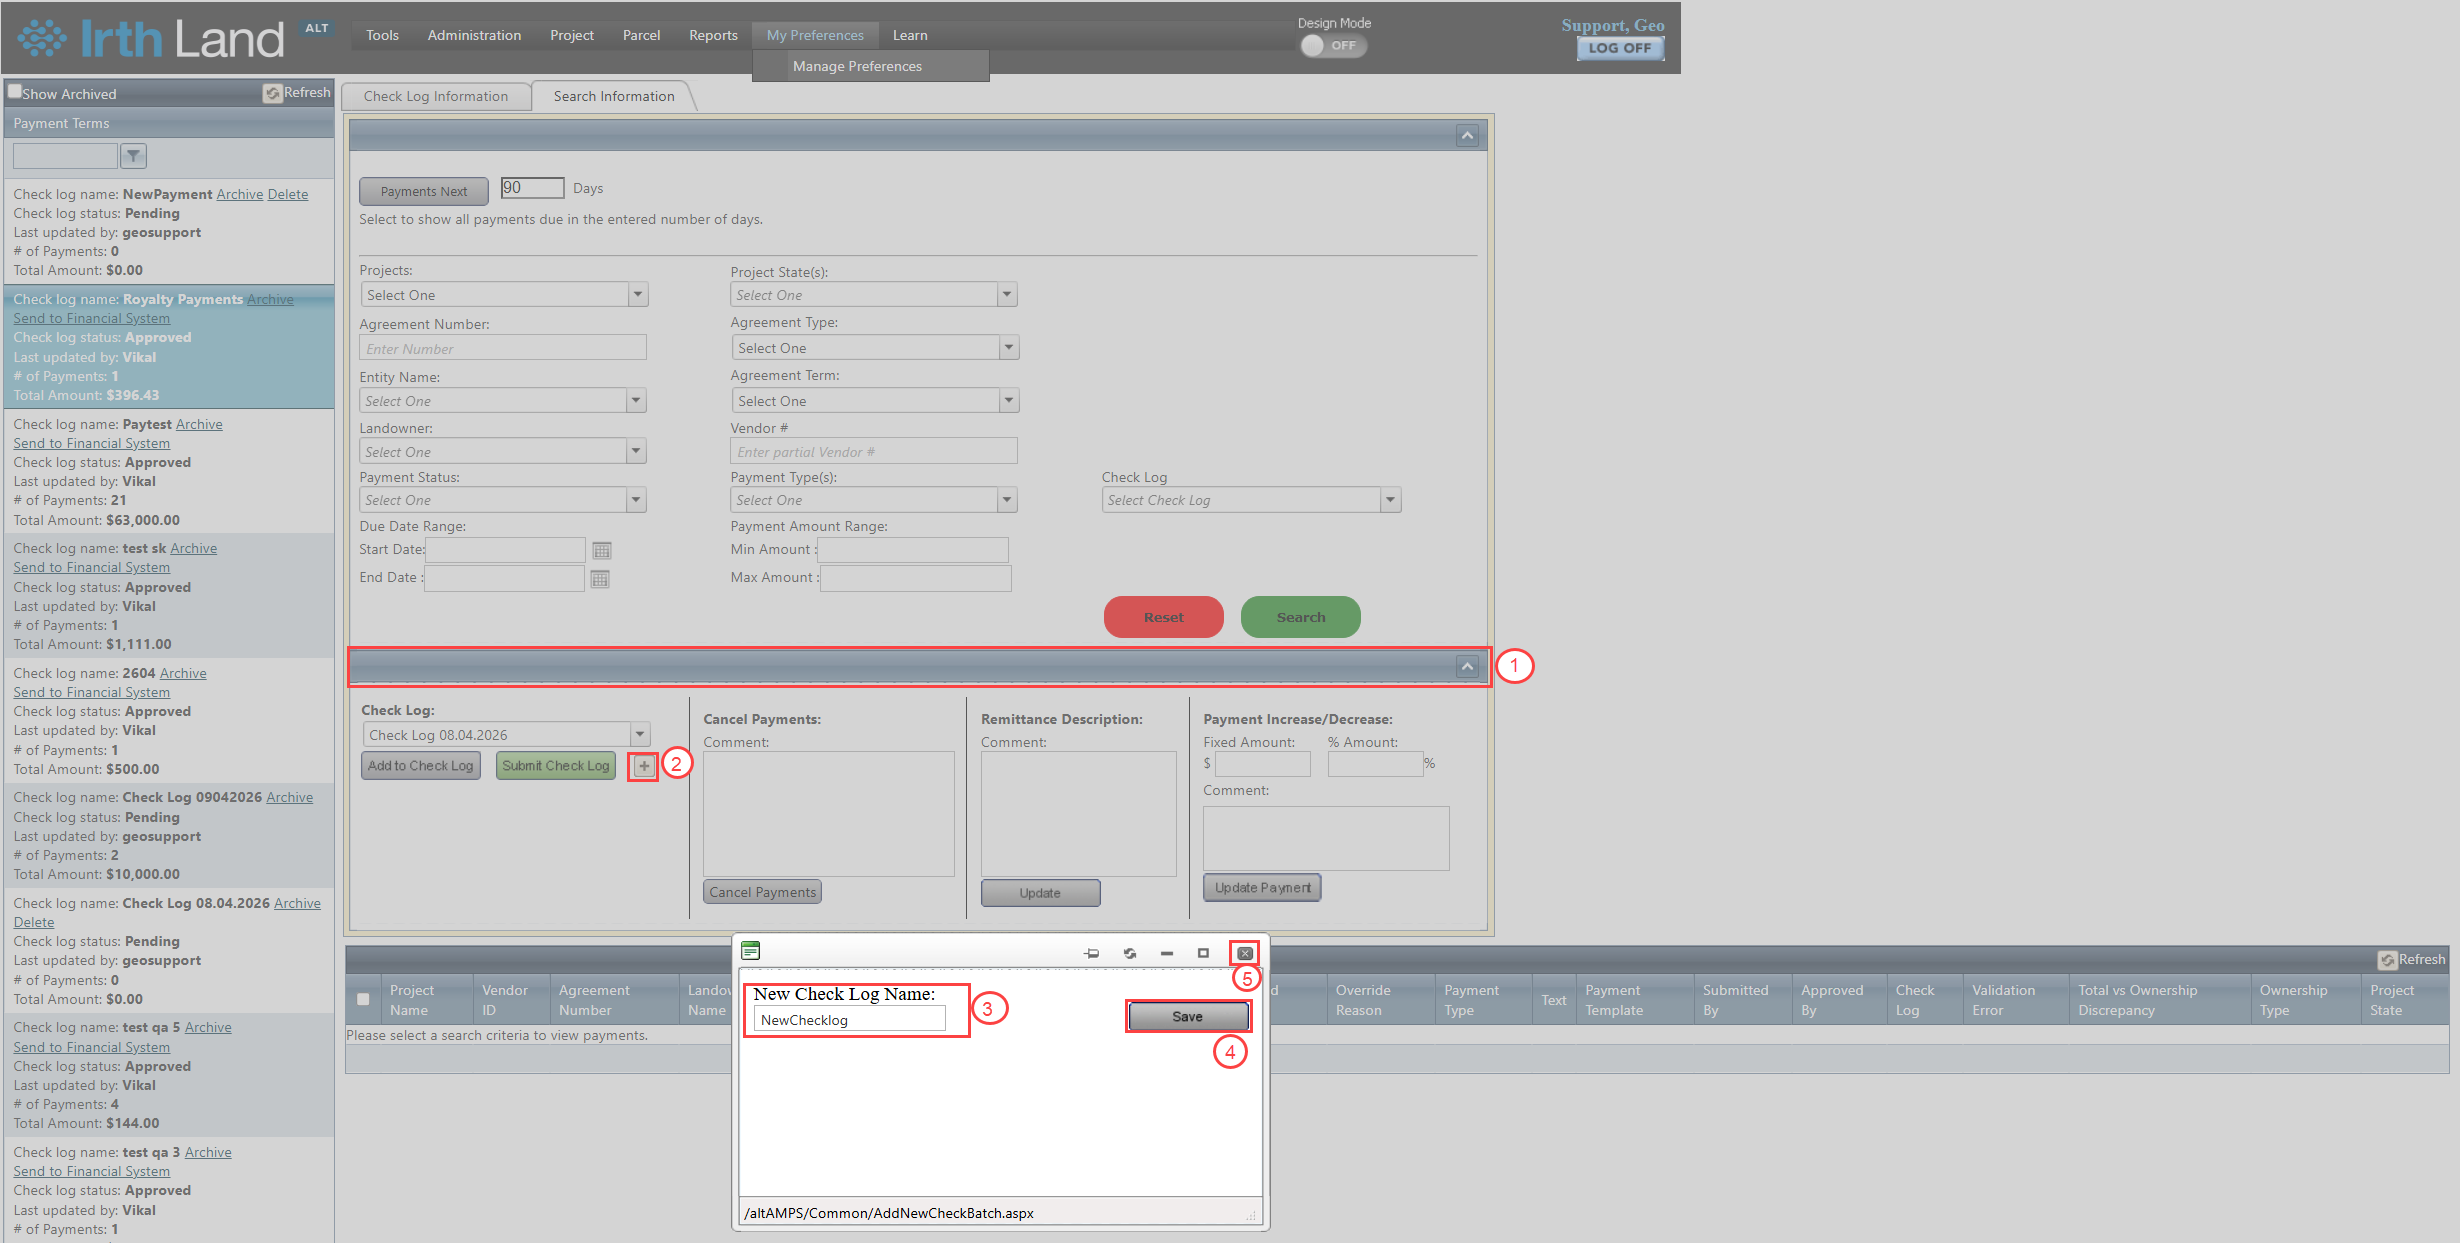
- Navigate to the Processing Options panel.
- Click the + icon located beside the Submit Check Log button.
- Enter a unique and descriptive name for the Check Log.
- Click Save.
- Close the pop-up window.
The newly created Check Log is automatically available in the Check Log dropdown list and does not require a page refresh.
B. Add Payments to a Check Log
After locating the payments and creating or selecting a Check Log:
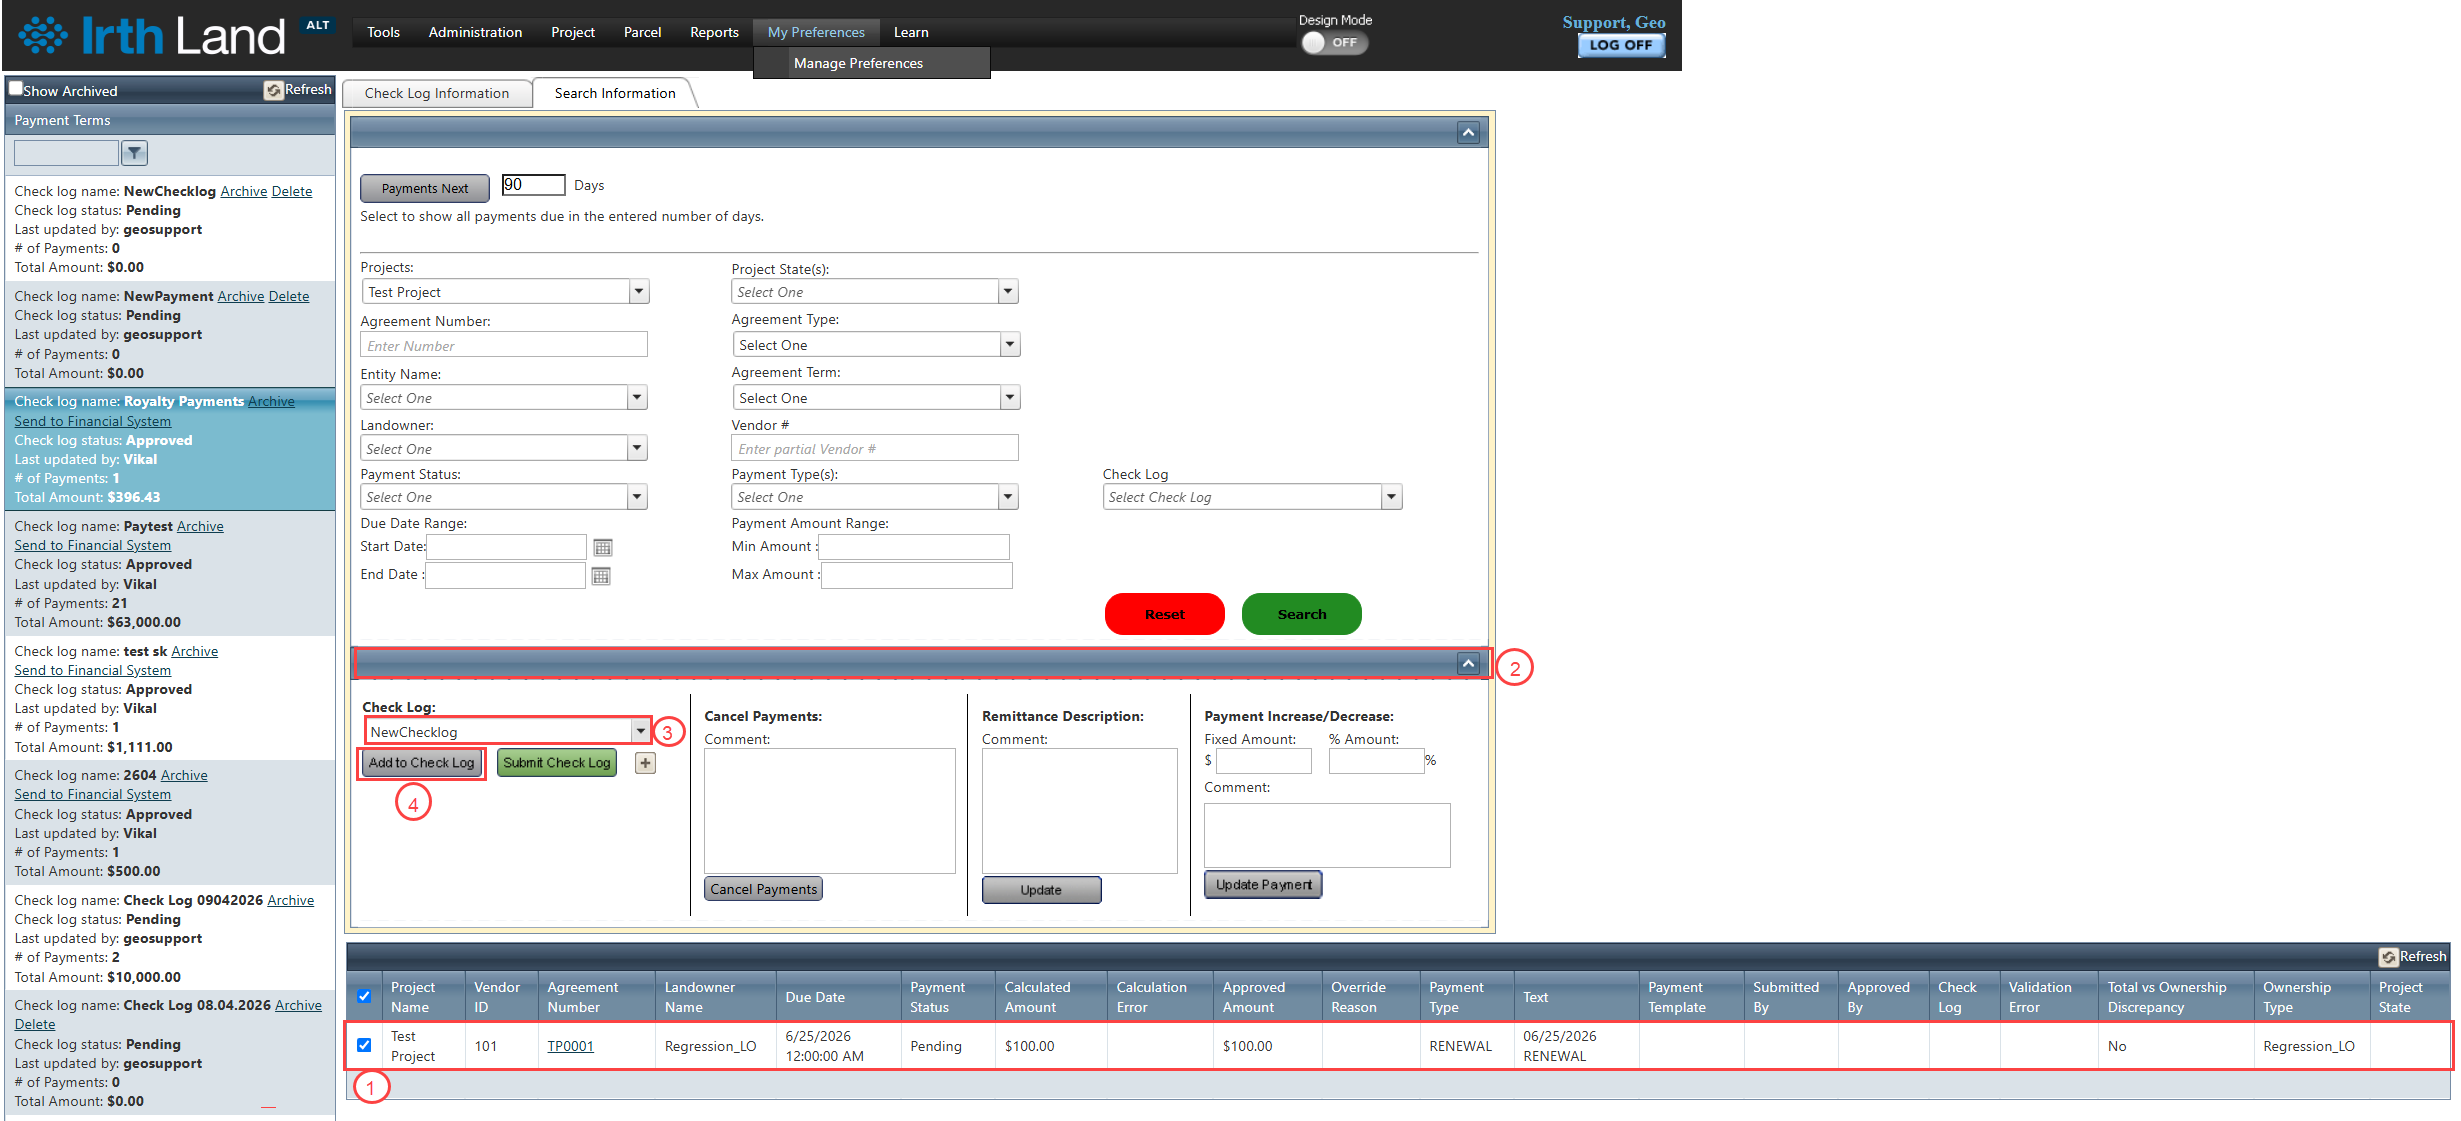
- Select one or more payment records from the search results.
- Navigate to the Processing Options panel.
- In the Check Log dropdown list, either:
- Select an existing Check Log, or
- Select the newly created Check Log.
- Click Add to Check Log.
The selected payments are added to the chosen Check Log and are ready for review and approval.
Related Features/Next Steps:
FAQ/Troubleshooting:
Q: Can multiple payments be added to the same Check Log?
A: Yes. A Check Log can contain multiple payment records.
Q: Can I add more payments after creating a Check Log?
A: Yes. Additional payment records can be searched for and added to the Check Log at any time before it is submitted for approval.
Q: What happens if I need to modify a payment after the Check Log has been submitted?
A: Depending on system permissions and workflow configuration, the Check Log may need to be rejected or returned to a pending status before payment modifications can be made.
Questions? Contact us!

Was this article helpful?
That’s Great!
Thank you for your feedback
Sorry! We couldn't be helpful
Thank you for your feedback
Feedback sent
We appreciate your effort and will try to fix the article