Absent Time Tracking & Customizable Time Record Tags
Purpose/Overview
In this article, you’ll learn how Absent Time Tracking and Customizable Time Record Tags work together to improve time record accuracy, simplify supervisor workflows, and provide greater visibility into unplanned absences. These features help administrators and supervisors categorize time entries, automatically generate absence records, and manage attendance without affecting payroll calculations.
You’ll also explore how to enable these features, configure time off types, test the daily Absent Time processor, and verify results through the UI, API, and reporting tools.
Navigation Path:
To access Absent Time Tracking settings, go to Utilisphere > System Management > Administration > General > Users
To configure Time Off Types or Absent Time, go to Utilisphere > System Management > Administration > General > Time Tracking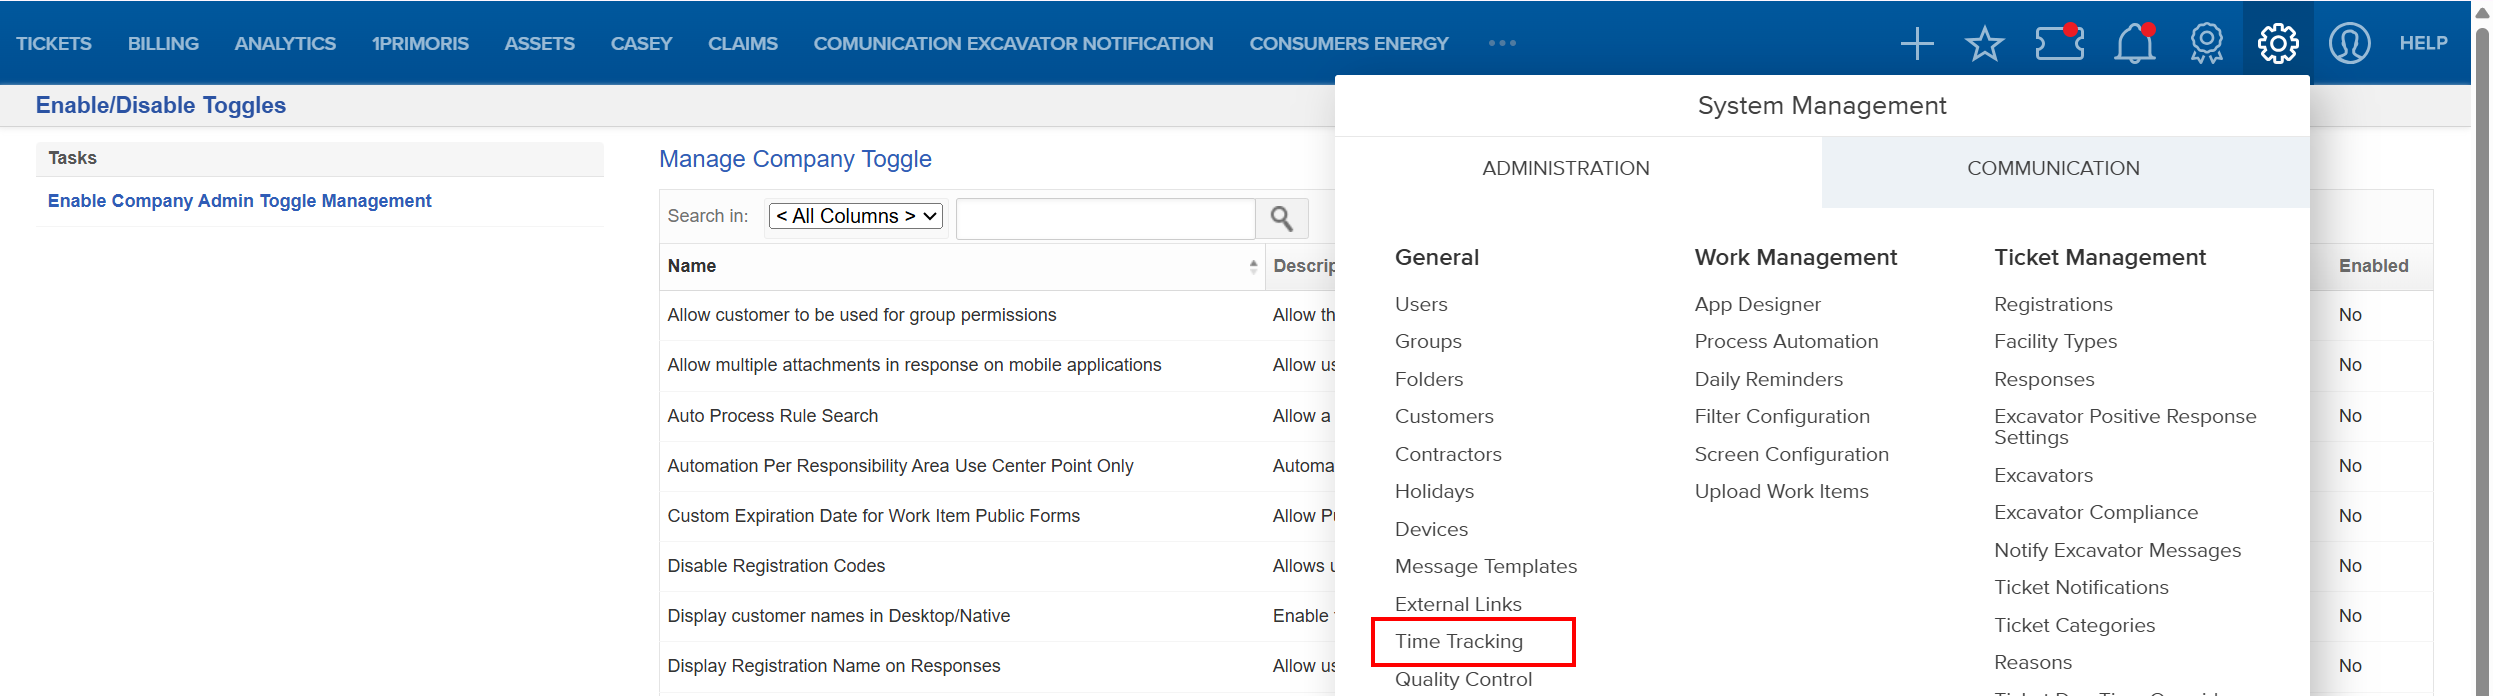
Things to Know:
Permissions:
- Only Irth System Admins can enable Absent Time Tracking.
- Only Company Admins can configure Time Off Types and Absent Time processors.
- Supervisors/Admins can add Absent hours and assign tags.
Behavior & Limitations:- Absent hours do not count toward total worked hours.
- Absent hours are not included in Payroll exports.
- Time records containing only Absent hours require approval.
- Custom tags can be applied to Absent-only records.
- Automatic Absent records generate at 4:00 AM EST on weekdays if criteria are met.
Key Benefits/Use Cases:
Improve Attendance Oversight: Automatically flag days when a user was scheduled to work but did not check in, giving supervisors immediate visibility into attendance patterns.
Maintain Accurate Reporting Without Affecting Payroll: Absent hours are cleanly separated from billable or payable time, preserving payroll accuracy while still tracking attendance history.
Flexible Categorization with Tags: Custom tags allow organizations to organize time records for audits, billing, or internal workflows.
How It Works:
Enable Absent Time Tracking
- Reach out to your Irth System Administrator to enable Absent Time Tracking.
Configuring Absent Time
- Go to System Management > Administration > General > Users

Select the user you want to update.

- Click Modify User.

- Assign a Supervisor. This enables the Notify when Absent and Notify Supervisor after Absent (in Hours) options.
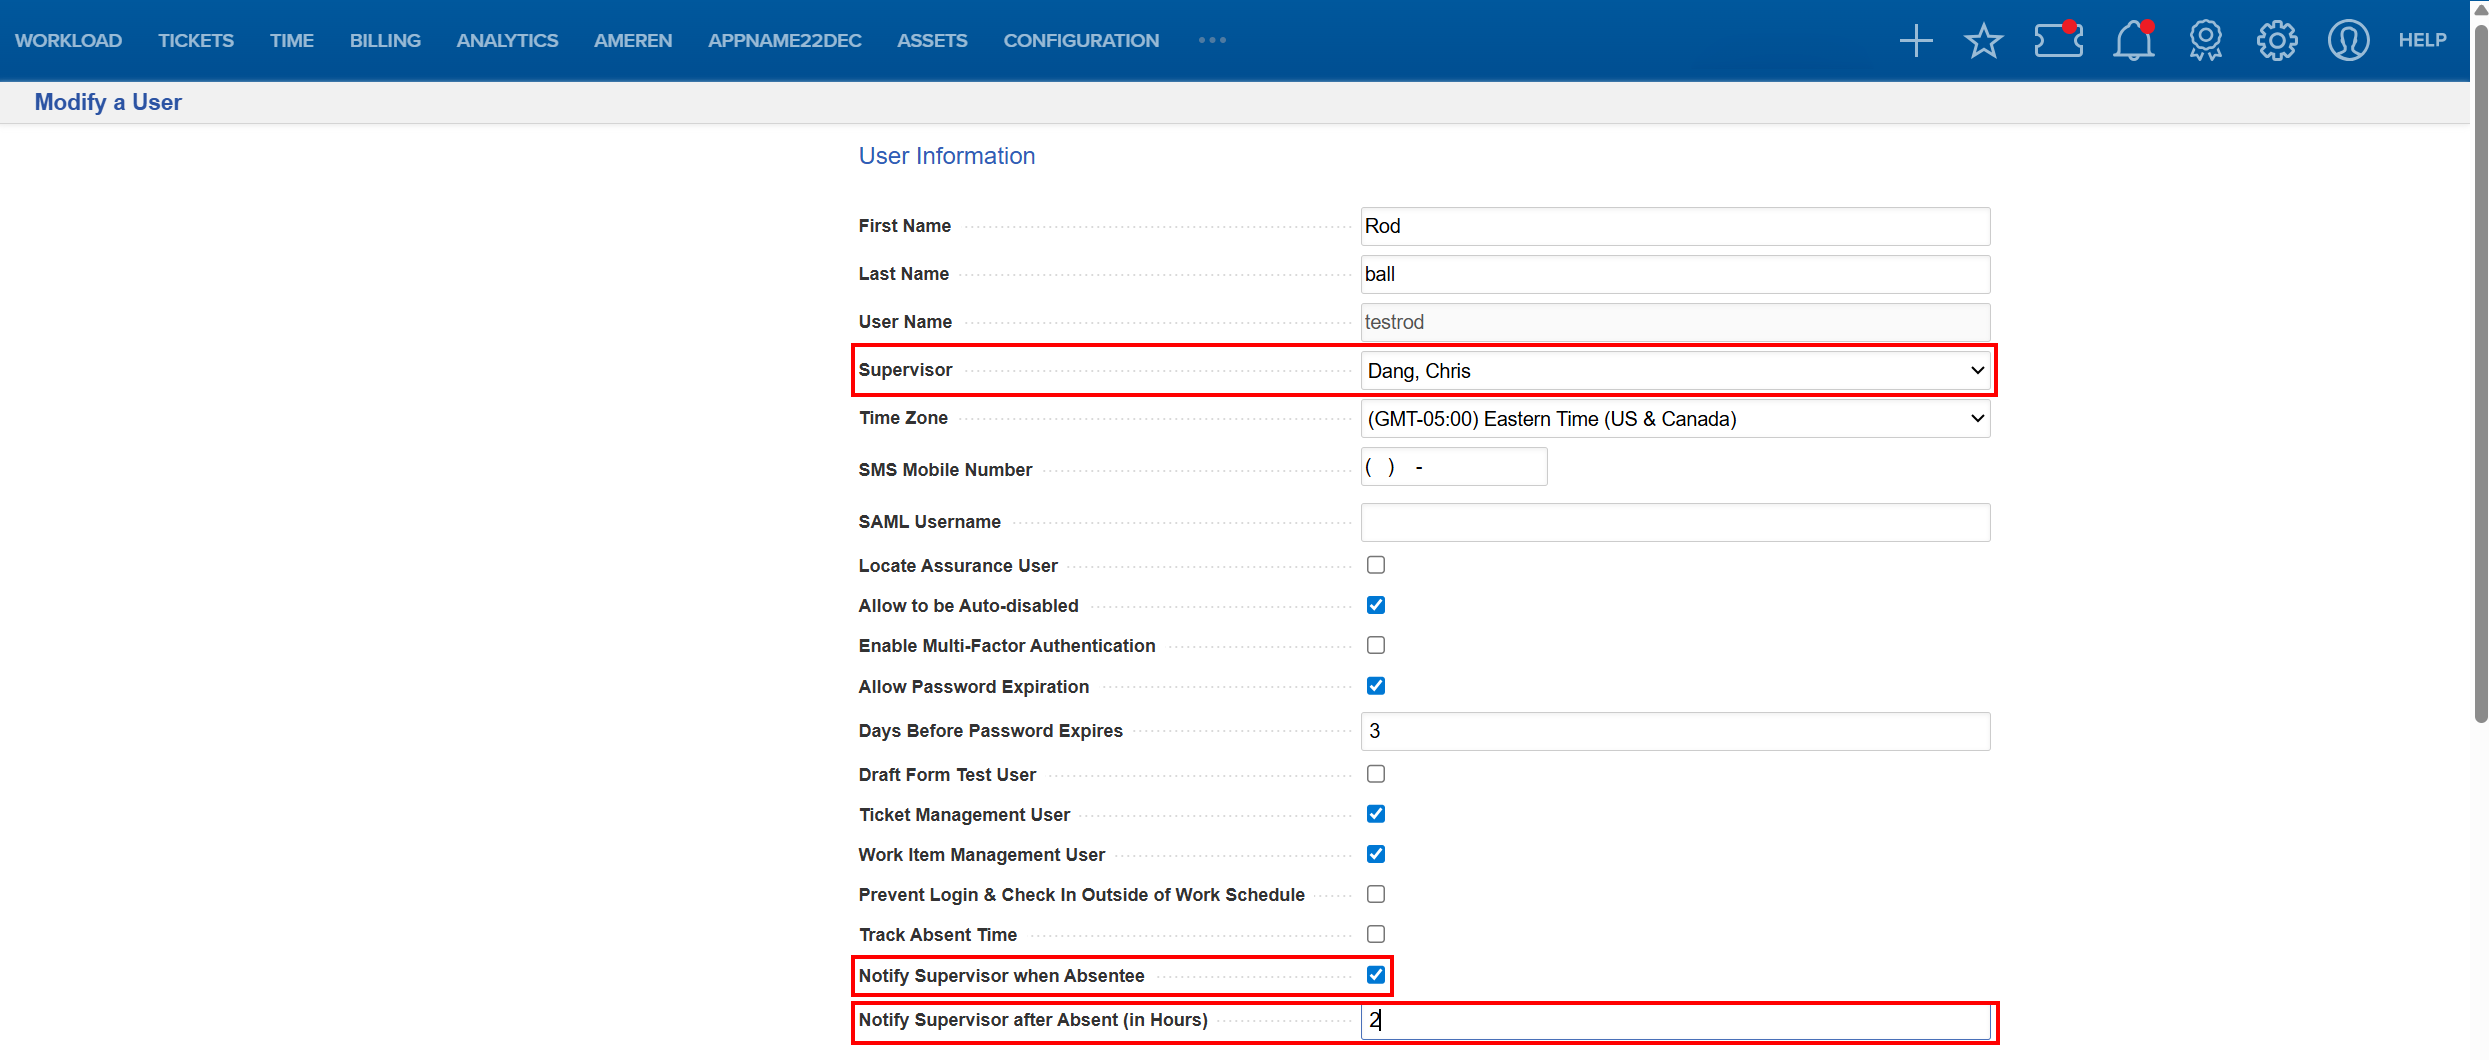
- Configure the notification settings as needed.
- Scroll to the bottom of the screen and click Save to apply your changes.

Configuring Time Off Types
- Go to System Management > Administration > General > Time Tracking
- Select Configure Time Off Types.

- Click Add Time Off Type.

- Fill out the Time Off Types form and Save.

Configuring Absent Time
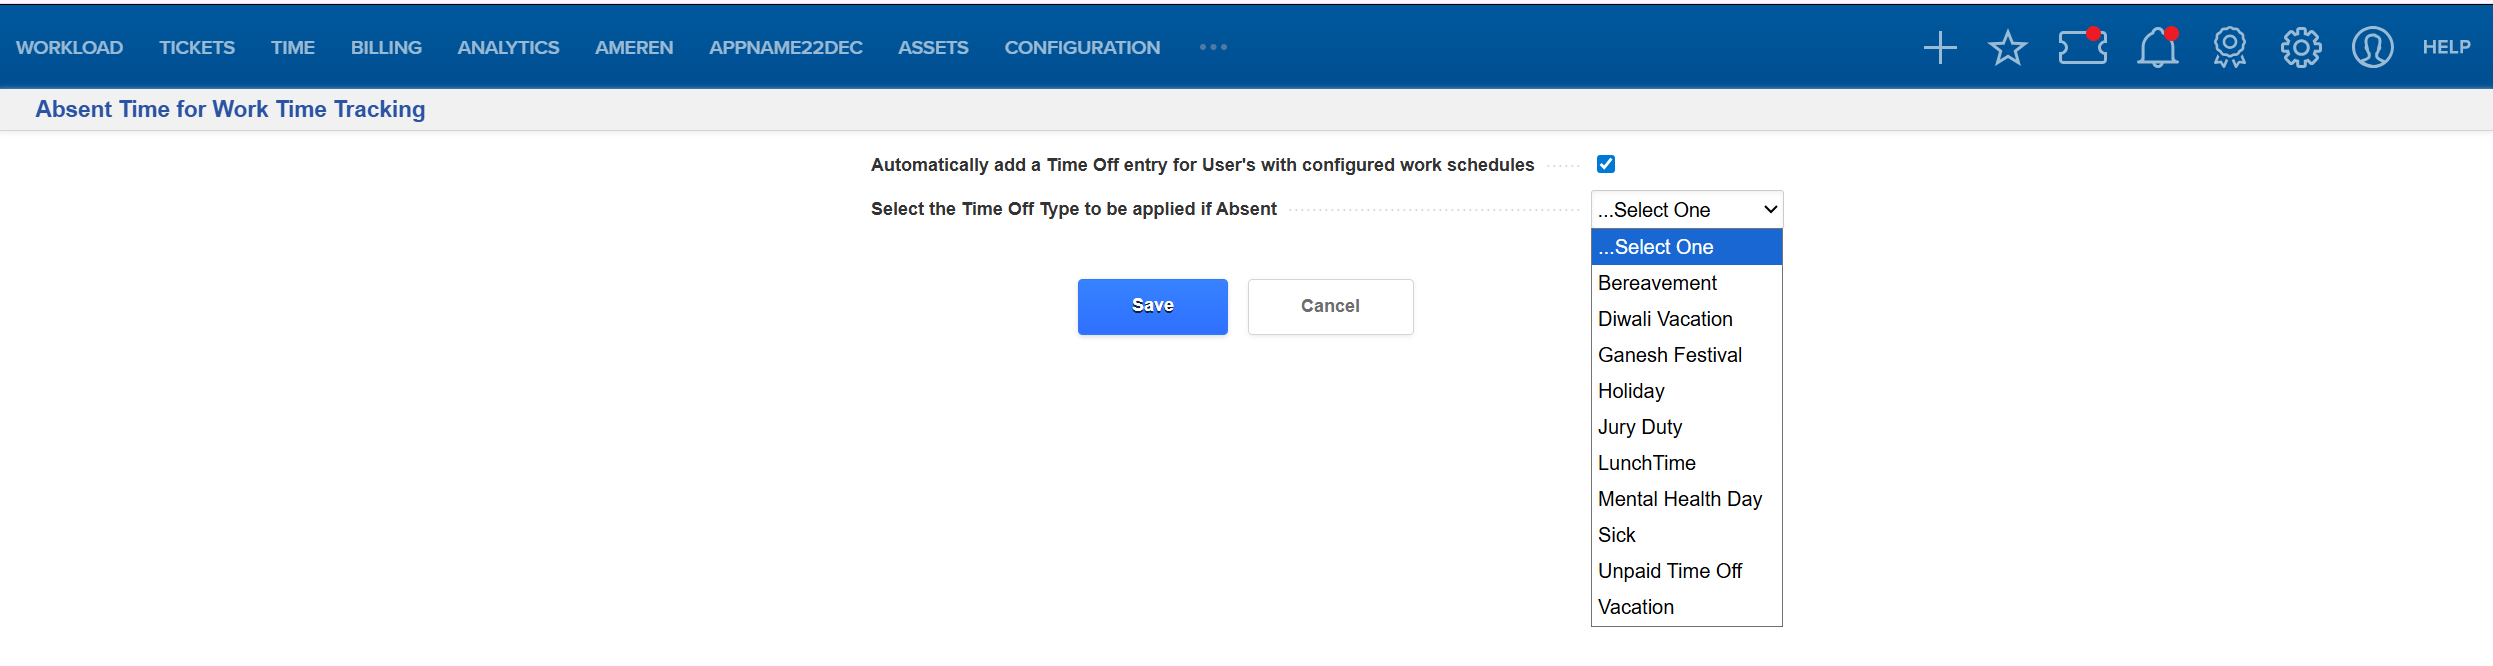
- Go to System Management > Administration > General > Time Tracking
- Select Configure Absent Time.

- Fill out the Absent Time for Work Time Tracking form and Save.
FAQ/Troubleshooting:
Q: Do Absent hours affect payroll?
A: No, Absent hours never contribute to any billable or payable totals.
Q: Can supervisors edit automatically generated Absent entries?
A: Yes, hours, tags, and approvals can all be modified.
Q: What if an Absent record appears on a scheduled day off?
A: Check the user’s Workload > Schedule settings and holiday configuration.
Questions? Contact us!

Was this article helpful?
That’s Great!
Thank you for your feedback
Sorry! We couldn't be helpful
Thank you for your feedback
Feedback sent
We appreciate your effort and will try to fix the article