Automating Ticket Alerts and Assignments
Purpose/Overview
In this article, you'll learn how Ticket Notifications work within Utilisphere and how to configure them to streamline your ticket management process.
Ticket Notifications automate communication and workflow by alerting users when specific ticket-related events occur. This ensures that tickets are reviewed, assigned, and acted upon promptly.
This feature is ideal for locators, supervisors, and administrators who need real-time awareness of ticket activity, folder updates, and assignment actions. By automating notifications, organizations can increase productivity, reduce delays, and improve accountability across teams.
Navigation Path:
To access this feature: Utilisphere > System Management > Administration > Ticket Management > Auto-Processing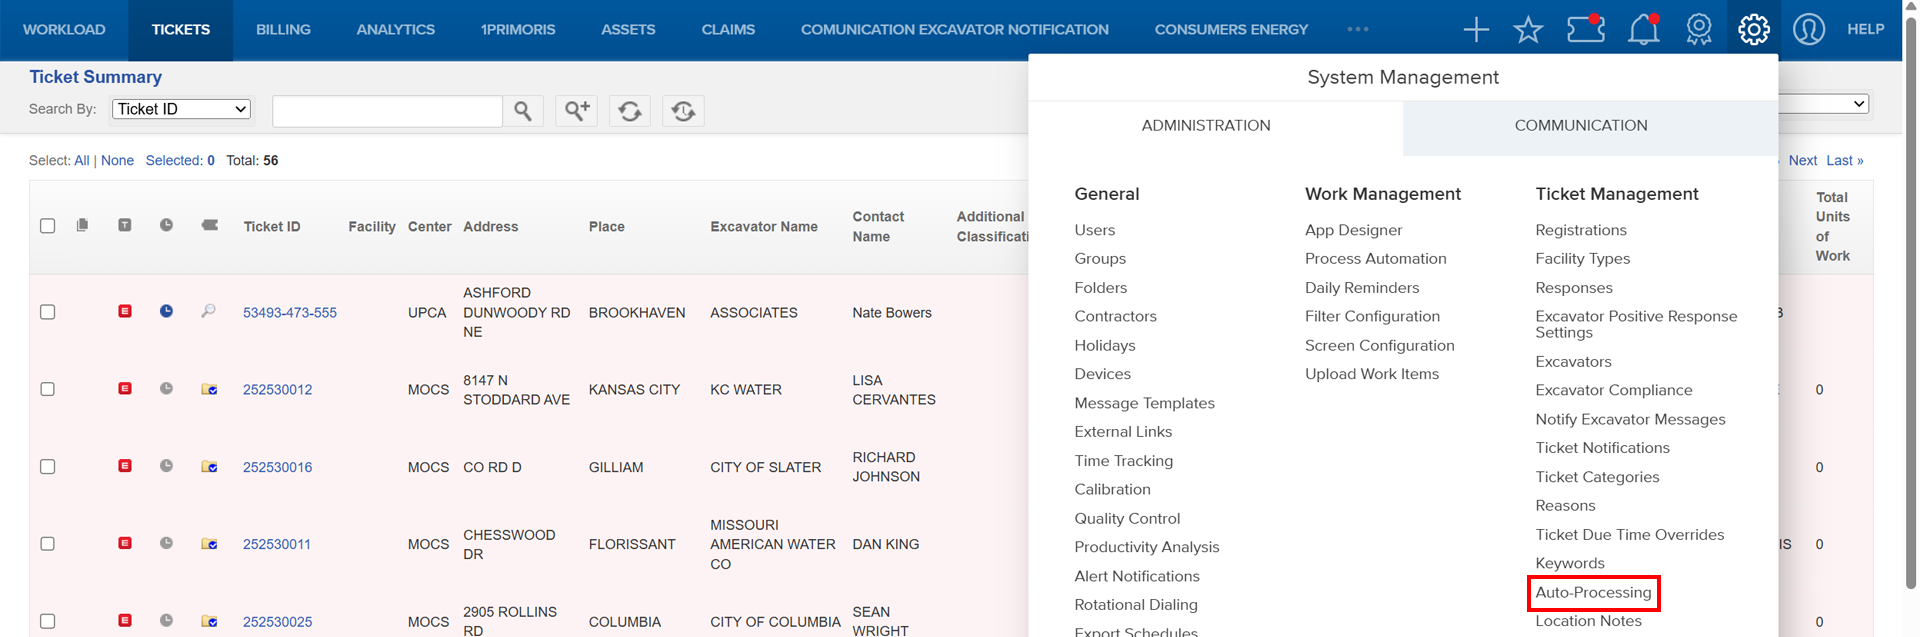
Things to Know:
- Permissions: You must have admin level access to configure notifications.
- Behavior Notes:
Assigning a ticket does not automatically notify the assigned person or company unless a notification is specifically set up for that event.
Notifications can be customized by event type, recipient, message content, and delivery schedule.
Key Benefits/Use Cases:
- Automated Ticket Alerts: Receive an instant alert when a new ticket arrives from One Call. This ensures locators or coordinators can review tickets immediately and begin processing without delay.
- Folder-Level Awareness: When a ticket is automatically placed in a folder, the assigned team or individual receives a notification. This helps ensure each folder’s workload is visible and managed efficiently.
- Assignment Confirmation: When a ticket is assigned, the recipient can be notified automatically, reducing the chance of missed or delayed work due to overlooked assignments.
How It Works:
Typical Scenario
Tickets from One Call are sent to Utilisphere and automatically processed based on Registration Code or Responsibility/Facility Area. These tickets are then placed into a Folder for a locator to manage.
For example:
A new ticket arrives and is automatically assigned to the correct Folder.
A Ticket Received Notification alerts the team that a new ticket is available.
A Put in Folder Notification alerts folder personnel that tickets require review.
A Ticket Assigned Notification alerts the assigned user that they’ve been given responsibility for the ticket.
(Remember: assigning a ticket alone does not send a notification unless you’ve configured one.)
Follow these steps to set up and enable Ticket Notifications:
Prepare Your Environment
Before creating notifications, make sure your foundational setup is complete:
Add a Map Definition to create Responsibility Areas or Facility Areas.
Add Users who will receive or manage ticket notifications.
Create Folders where tickets will be organized (e.g., by area, locator, or facility).
Add Groups and define permissions.
Associate users to groups and to the appropriate folders.
Users can belong to multiple groups if needed.
Configure Views and Filters
Set up Filters to define how tickets are displayed and grouped.
Set up Screens to determine what each group sees upon login.
Associate Groups to specific Filters or Screens to tailor the user experience.
Enable Auto-Processing
To automatically place tickets in folders or trigger actions:
Go to Ticket Management > Auto-Processing.
Choose your automation type (e.g., Auto Folder Placement by Registration Code).

Define your processing rules.
The system processes in this order:
Auto Response → Auto Folder Placement → Auto Assignment


Create Ticket Notifications
Now that your automation rules are set:
Navigate to System Management > Administration > Ticket Management > Ticket Notifications.

Select Ticket Put in Folder Notification (or another event type).

Choose the triggering event, message content, recipients, and delivery method, and Save your configuration
Related Features/Next Steps:
- Managing Users
- Working with Folders
- Groups Overview
- Process Automation
- Auto-Processing Ticket based on Excavator and Keyword
FAQ/Troubleshooting:
Q: I assigned a ticket, but the locator didn’t get an email. Why?
A: Assigning a ticket does not automatically notify the recipient. You must set up a Ticket Assigned Notification event.
Q: Can I customize the message content in a notification?
A: Yes. You can modify the message text, include ticket details, and choose delivery methods and timing.
Q: What if my notifications are delayed or not sending?
A: Verify that notification rules are active, the recipient’s email is valid, and your organization’s notification schedule allows immediate delivery.
Questions? Contact us!

Was this article helpful?
That’s Great!
Thank you for your feedback
Sorry! We couldn't be helpful
Thank you for your feedback
Feedback sent
We appreciate your effort and will try to fix the article