Auto-Processing Tickets Based on Excavator & Keyword
Purpose/Overview
In this article, you’ll learn how to automatically direct tickets to specific folders based on the excavator name and keywords such as the “Done For” project field.
This feature helps automate ticket organization, saving time and reducing manual work. It ensures that tickets from particular excavators or projects are routed to the correct folder or team automatically, making ticket management faster, more accurate, and more consistent across your organization.
Navigation Path:
To access this feature: Utilisphere > Administration > Ticket Management > Keywords
Things to Know:
- Permissions: Only users with administrative or ticket management configuration rights can create or edit auto-processing rules.
- Platform Support: Available on both web and desktop platforms.
- Behavior:
Auto-processing follows a strict order:
Auto Response
Auto Folder Placement
Auto Assignment
Rules run automatically as new tickets are received.
How It Works:
Let's use the following ticket as an example: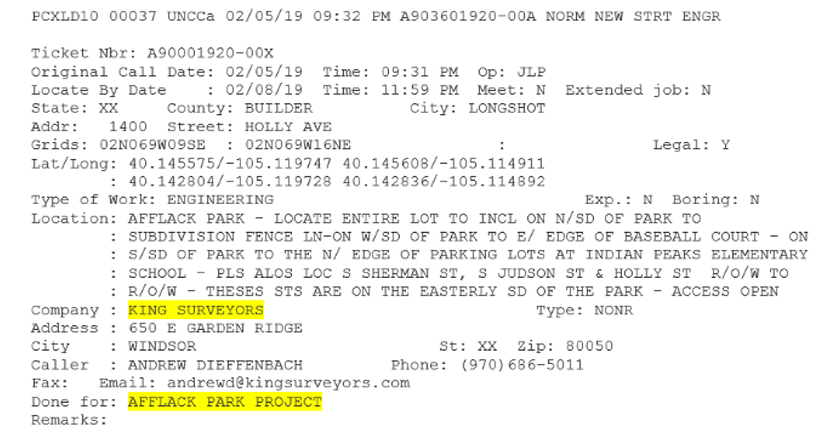 Follow these steps to setup or enable this feature:
Set Up Keywords
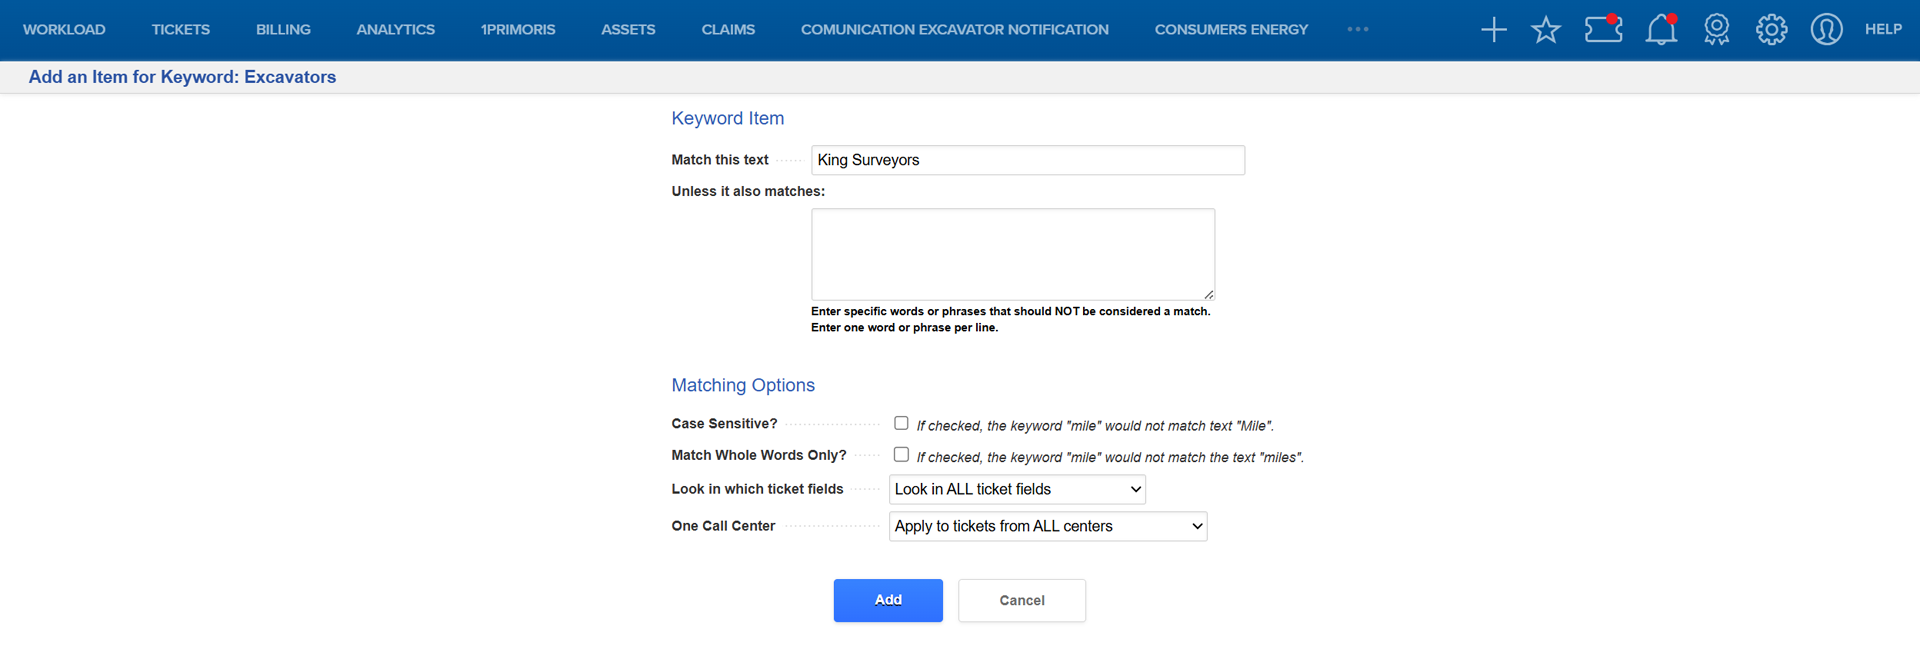
- Go to Administration > Ticket Management > Keywords and click Add a Keyword.

- Under that keyword, click Add a Keyword Item and define specific excavators (e.g., King Surveyors) and Save.

- Next, select Add a Keyword Item.

- Fill in the form and click Add.
Repeat this process for the “Done For” field, adding items such as Afflack Park Project.
Set the Folder Placement Rule (Auto-Process)
- Go to Administration > Ticket Management > Auto-Processing.
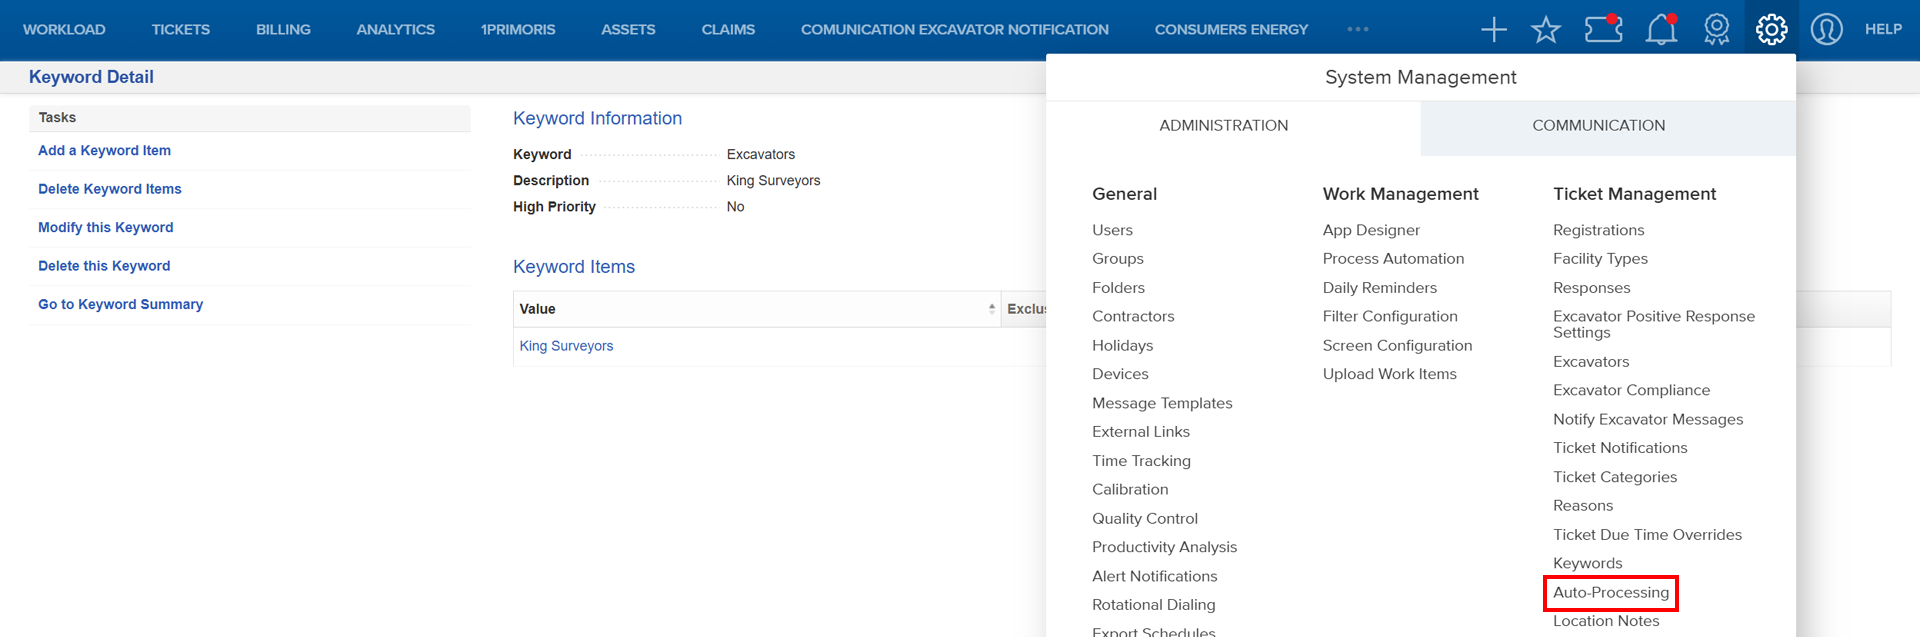
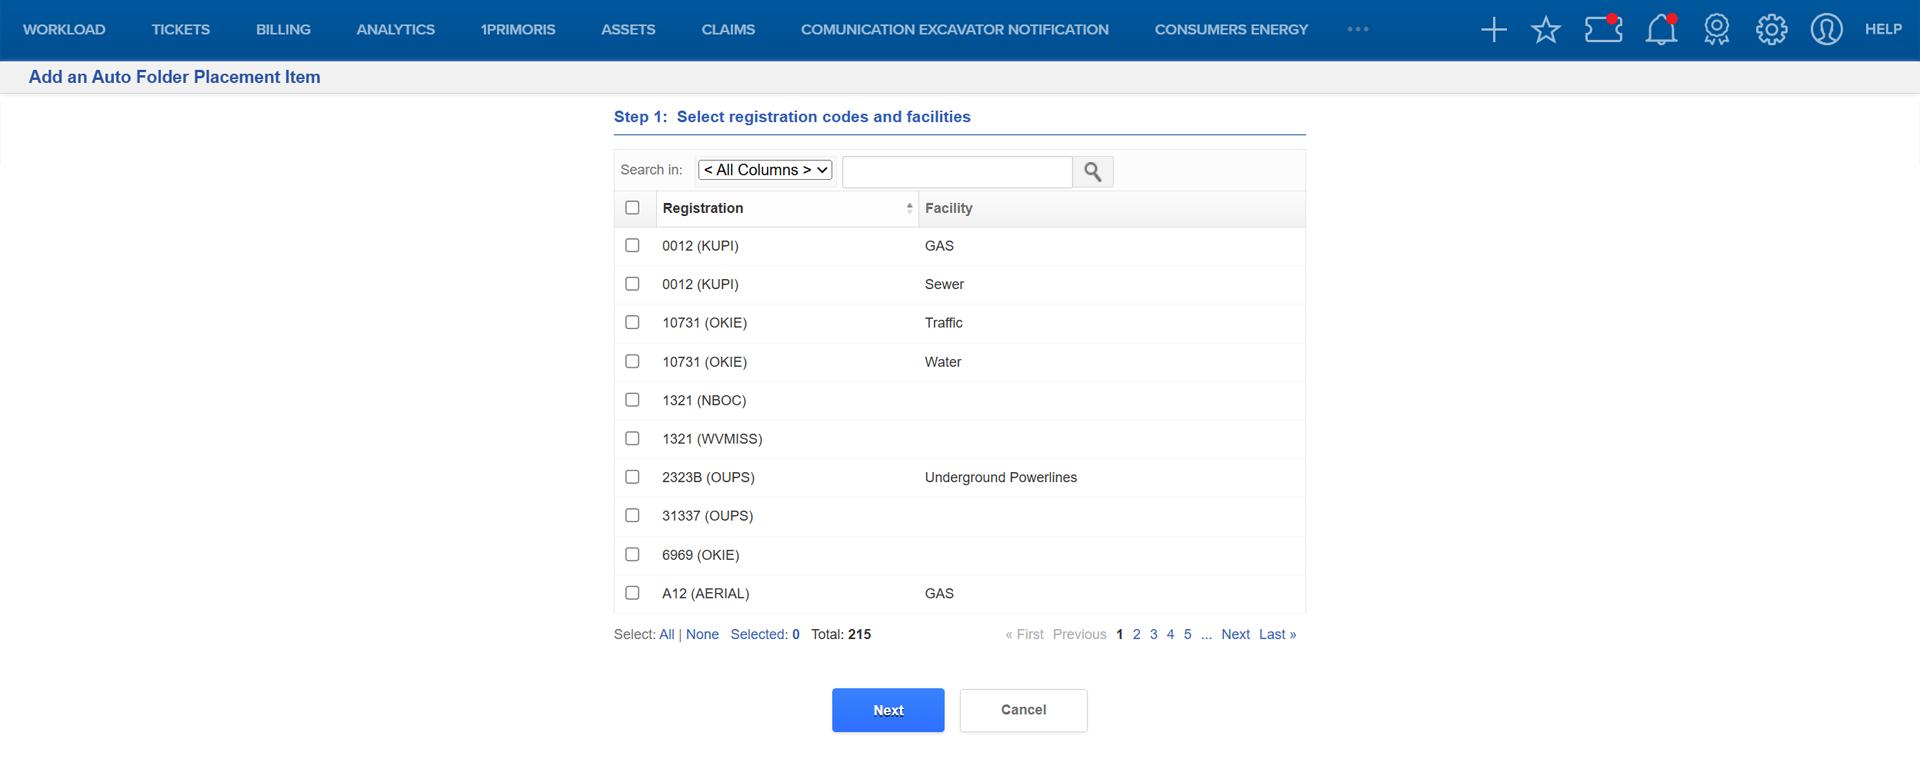
- Click Auto Folder Placement and select Add an Auto Folder Placement Item.


- Fill out the form to define the rule to direct tickets matching both the excavator and keyword to the correct folder.
Note: The system processes in this order: Auto Response → Auto Folder Placement → Auto Assignment
Set Up a Notification (Action Trigger)
- Go to Administration > Ticket Notifications.
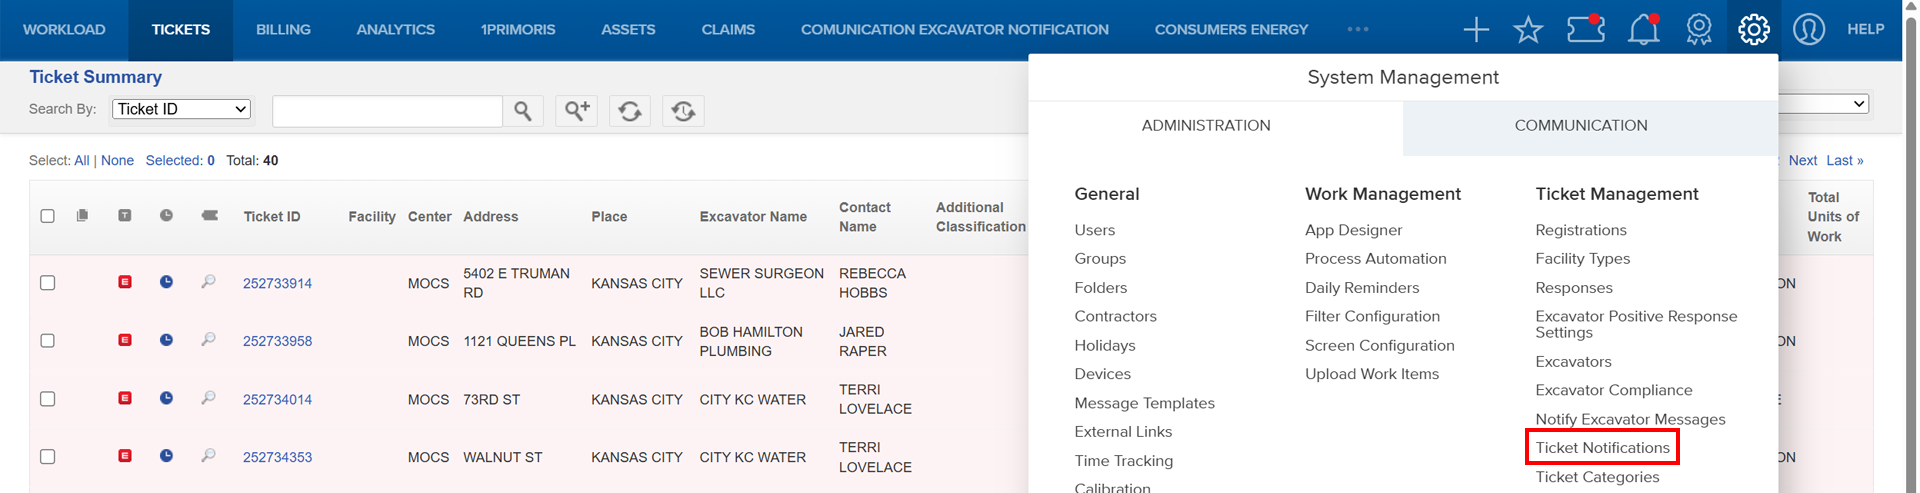
- Select Ticket Put in Folder Notification and Add a Ticket Put in Folder Notification.


- Fill out the form to create a notification rule that alerts users or teams when a ticket is automatically placed in a folder.

Related Features/Next Steps:
FAQ/Troubleshooting:
Q: Why isn’t my ticket moving to the correct folder?
A: Verify that both the Keyword and Auto Folder Placement rules are configured correctly and that text matches exactly (case-sensitive).
Q: Can I have multiple keywords for the same excavator?
A: Yes. You can add multiple keyword items under one keyword group to handle variations in naming.
Q: What happens if two rules apply to the same ticket?
A: The system processes rules in order — Auto Response first, then Auto Folder Placement, and finally Auto Assignment. The first applicable rule is used.
Questions? Contact us!

Was this article helpful?
That’s Great!
Thank you for your feedback
Sorry! We couldn't be helpful
Thank you for your feedback
Feedback sent
We appreciate your effort and will try to fix the article