Purpose/Overview
The Import feature in ALT/ROW allows users to upload parcel-related information in bulk using Excel spreadsheets. This functionality reduces manual data entry and enables faster onboarding of large volumes of parcel data into the system.
The import process uses predefined Excel templates that mirror parcel-related fields in the application, ensuring consistency, accuracy, and structured data entry.
This feature is intended for users managing parcel data, such as project administrators, land teams, and data management users.
Navigation Path:
To access this feature: Project > Import
Things to Know:
- Import supports parcel-related data only (not project-level data)
- Templates are system-defined Excel files with predefined fields
- Files may contain multiple worksheets (tabs)
- Users must select the correct worksheet before importing
- Data must align with the selected project
- Documents and mappings must follow system-defined structure
- Duplicate handling options (Warn/Ignore) affect import behavior
Key Benefits/Use Cases:
- Bulk Parcel Data Upload: Efficiently upload large volumes of parcel or land-related data
- Improved Efficiency: Reduce manual data entry and save time
- Data Standardization: Ensure consistent and structured parcel data using templates
How It Works:
Step 1: Prepare the Template (Pre-Processing)
- Use the system-defined Excel template
- Identify the correct worksheet based on the data type
- Example: Use “10. Land Data” for parcel data
- Enter all required parcel information in the appropriate fields
- Save the file in Excel format
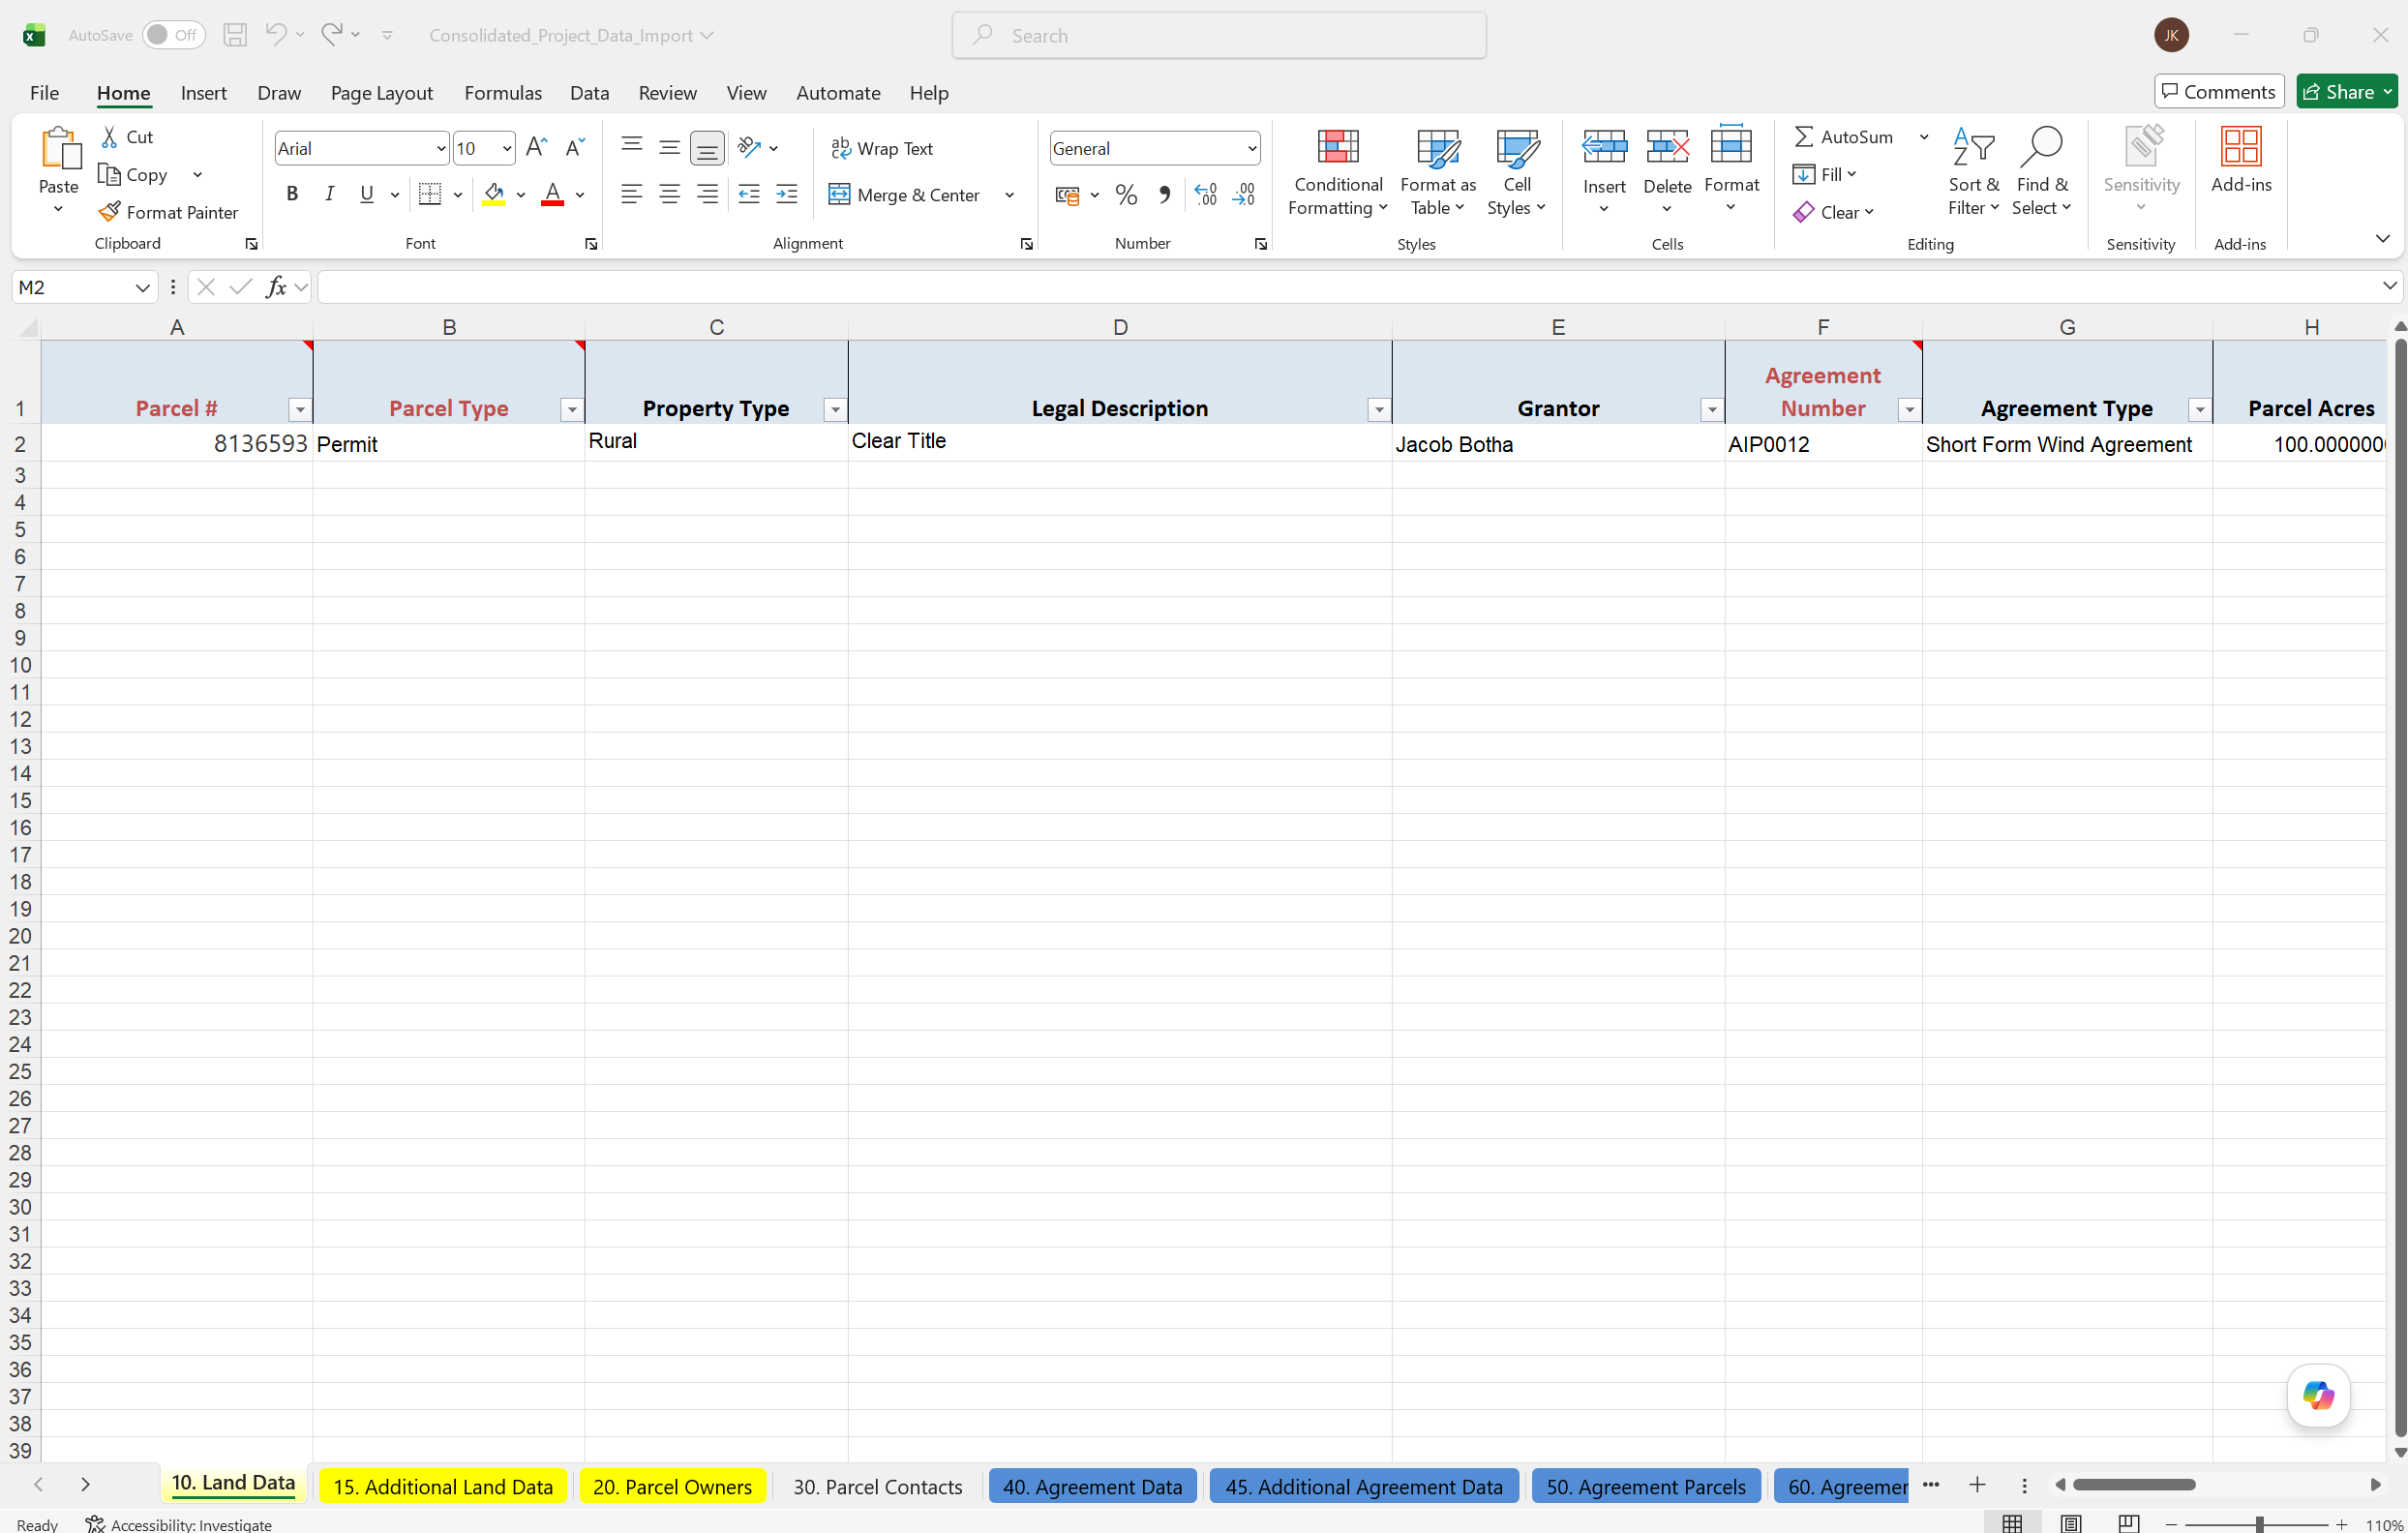
Step 2: Upload the Template
- Navigate to Project > Import
- Click Select and upload the completed template
- The system will display the uploaded data in the summary grid
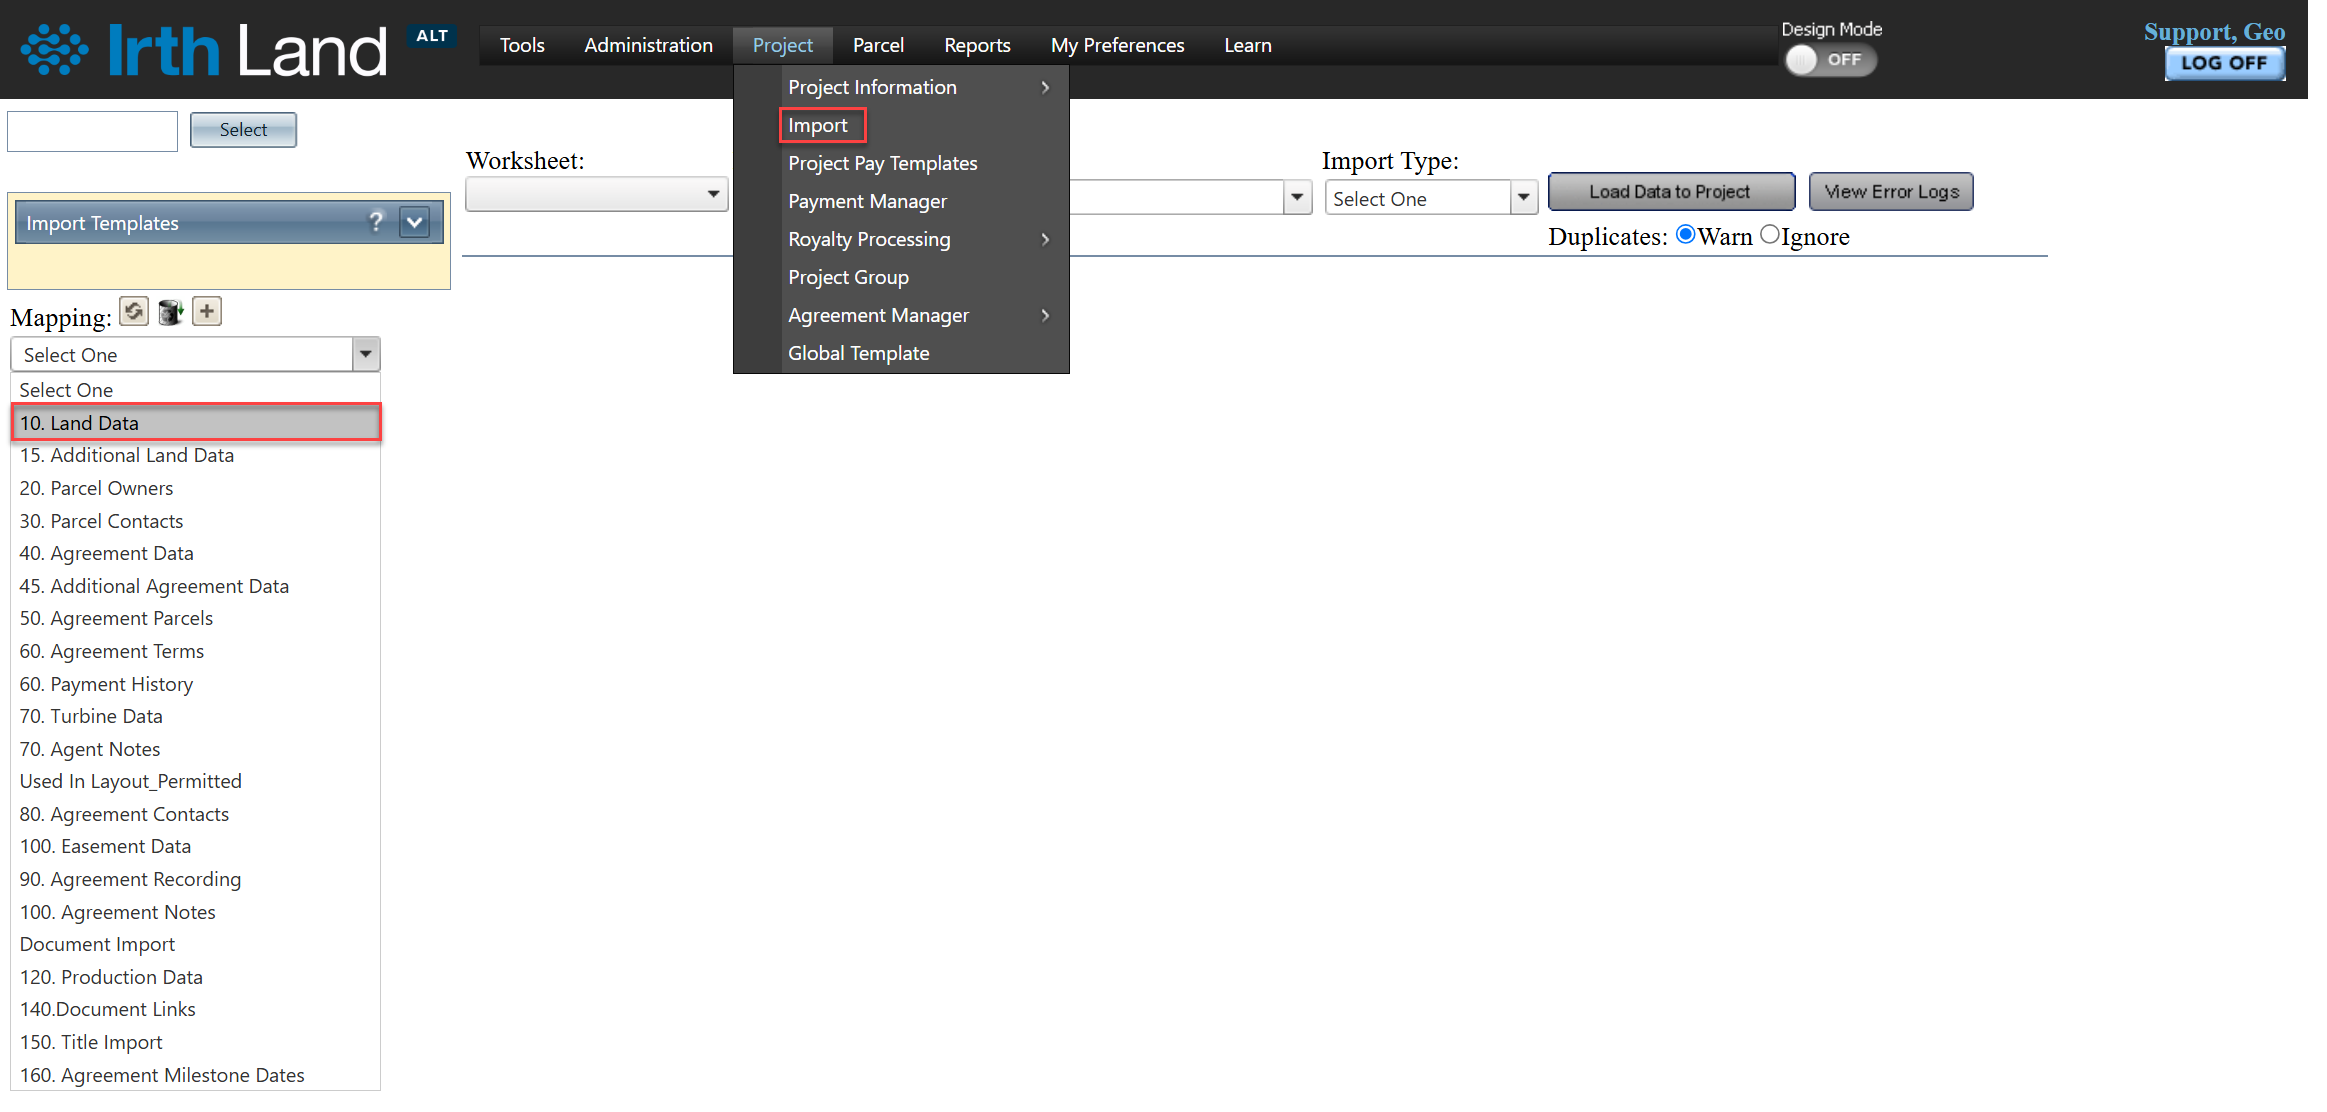
Step 3: Select Worksheet & Import Type
- If the file contains multiple tabs, select the correct Worksheet
- Choose the appropriate Import Type (parcel-related)
- Ensure the selected data matches the intended project
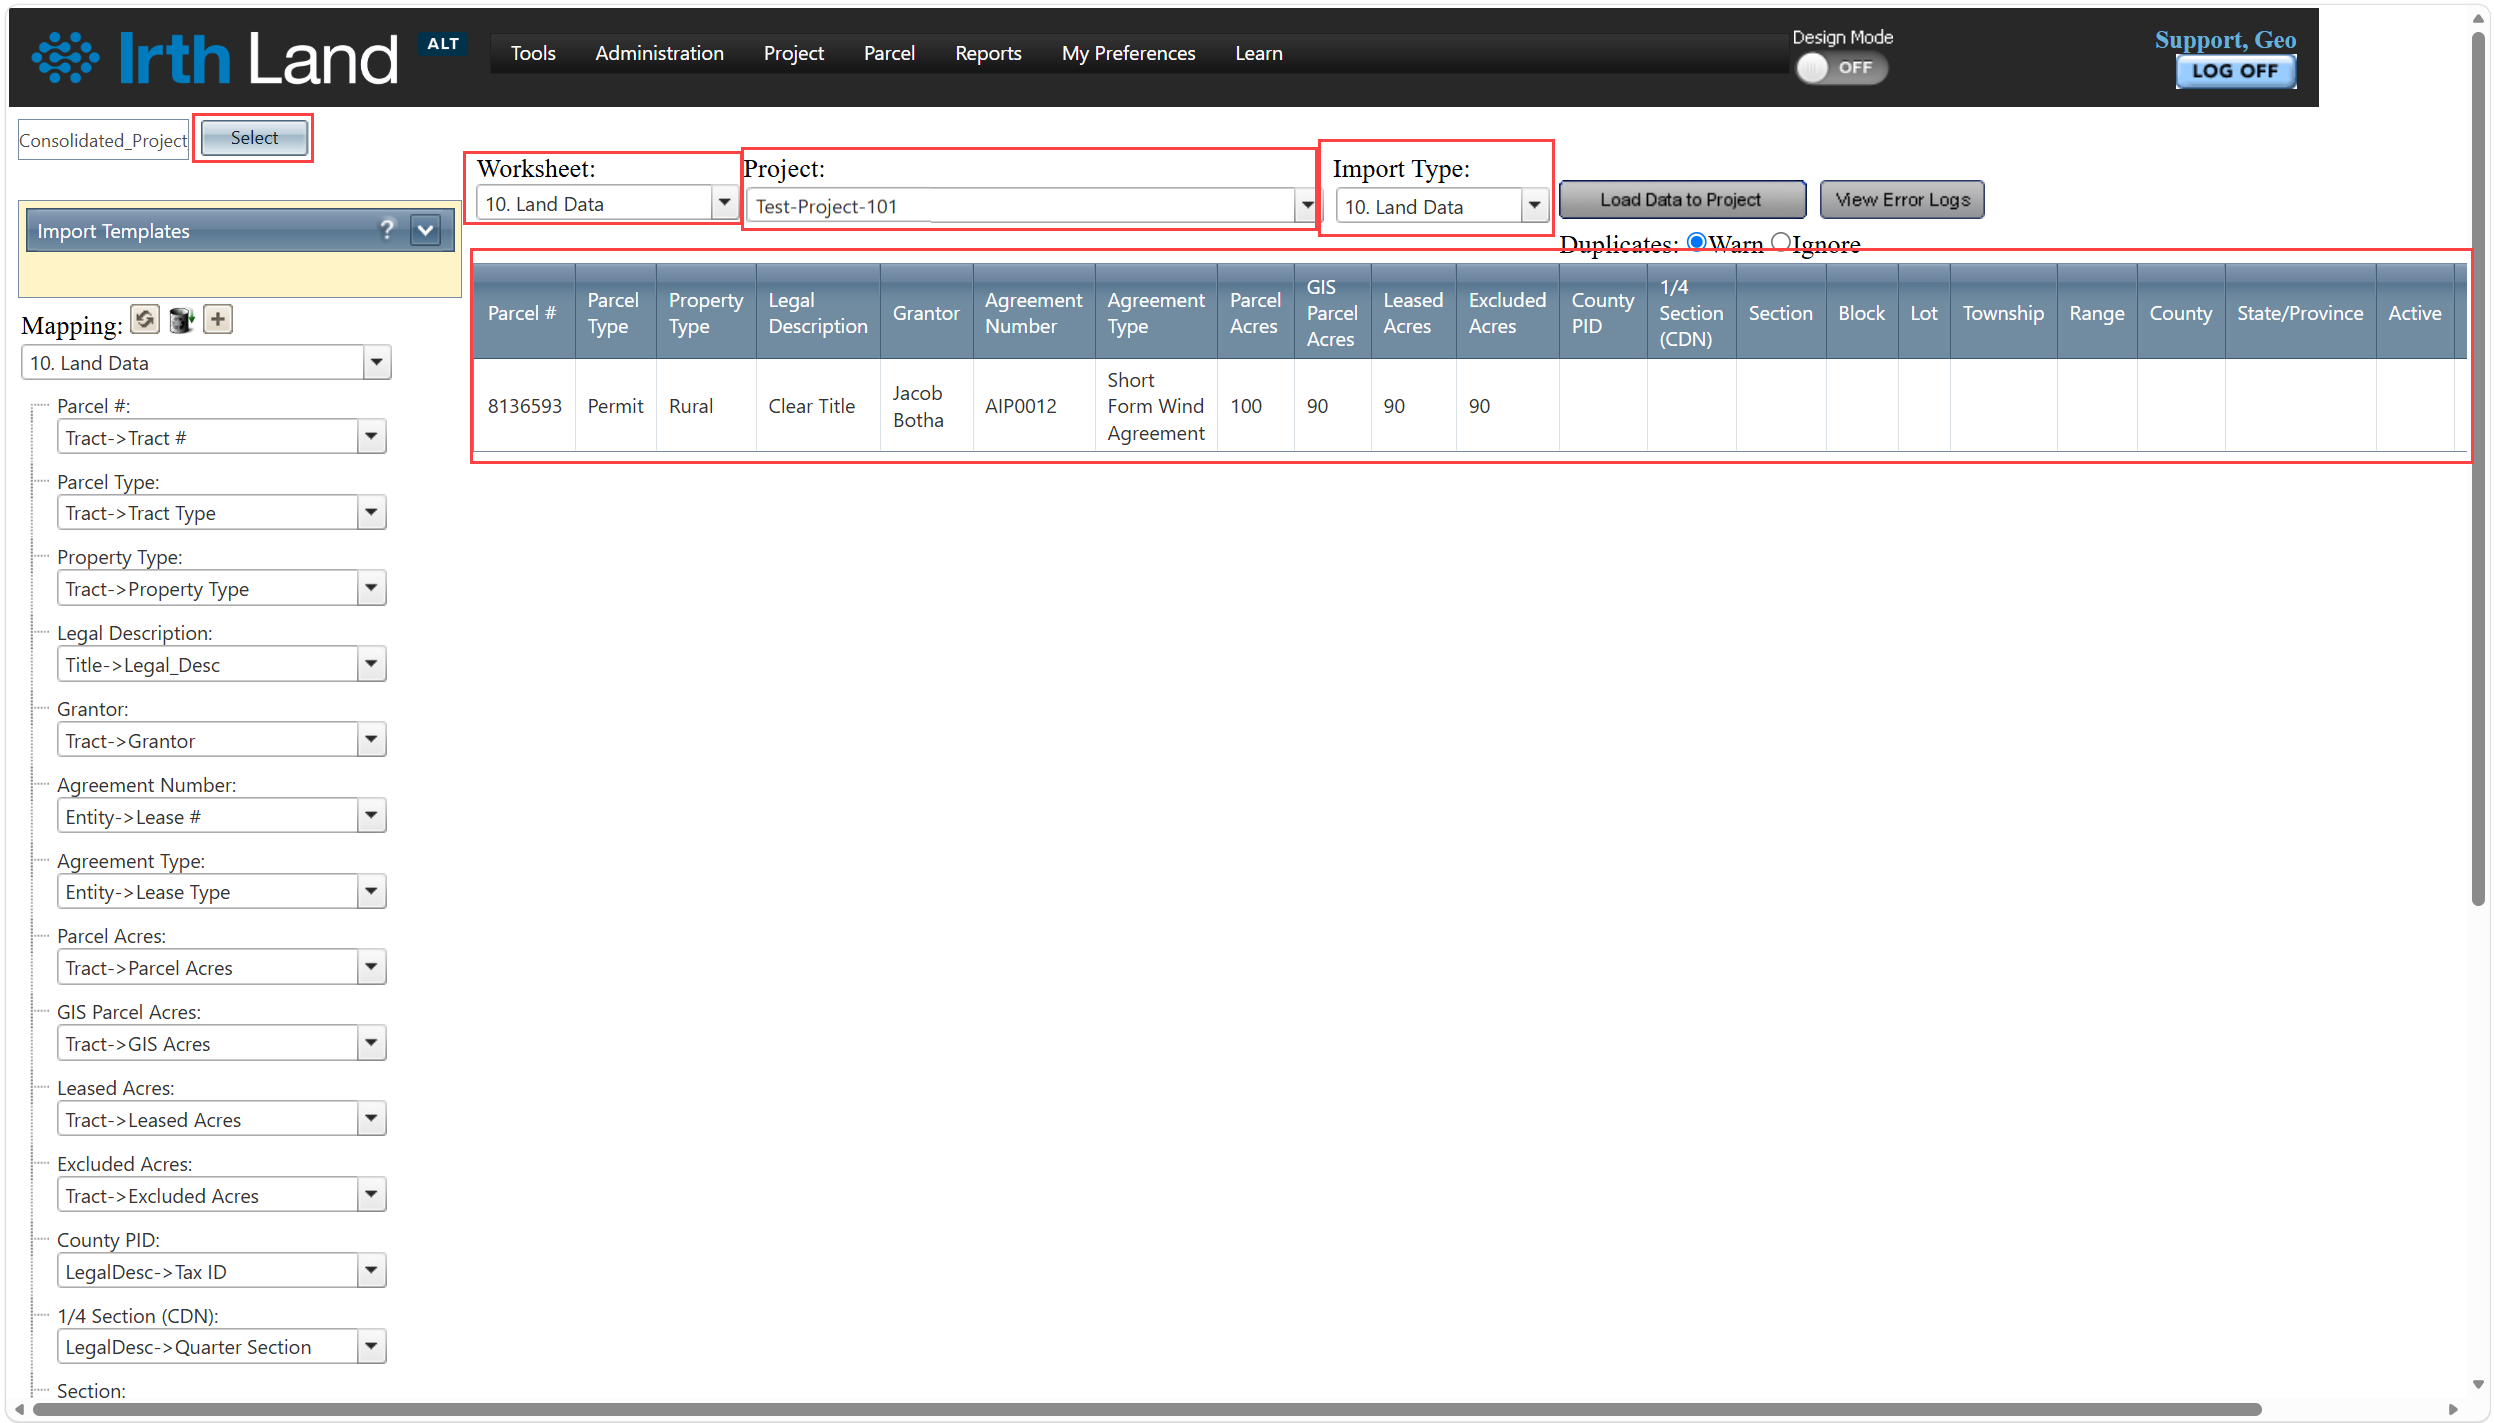
Step 4: Data Mapping (Processing)
- Select the Data Mapping type (e.g., landowner data, contact data, parcel notes)
- The system will attempt to automatically map fields
- Review all mappings carefully
- Manually map any unmapped fields using dropdown options
- Click Save Mapping
- Use Plus (+) icon to add mapping or Bin icon to delete mapping
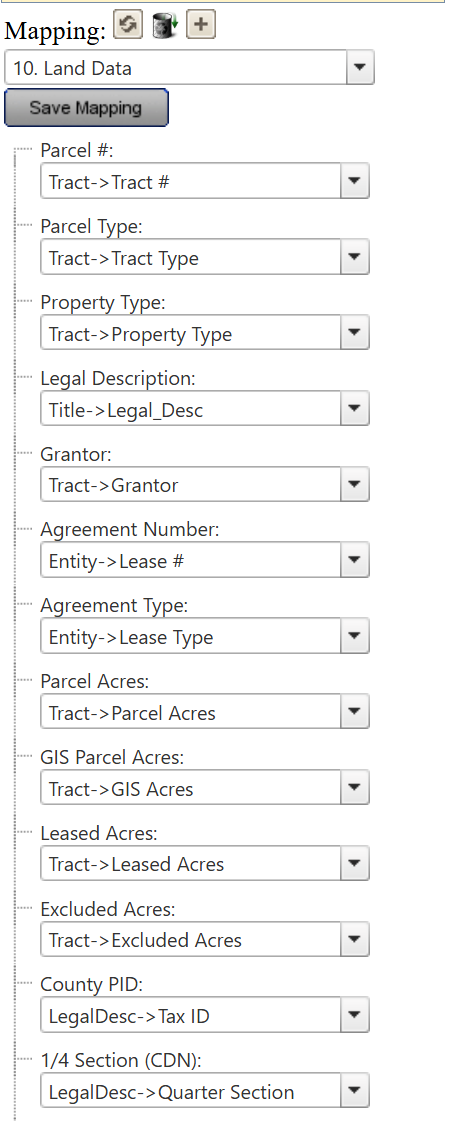
Tip: Match dropdown selections with field labels (e.g., select “LO → First Name” for First Name field)
Step 5: Load Data to Project
- Select the target project from the Project dropdown
- Choose duplicate handling option:
- Warn: Stops import until all errors are resolved
- Ignore: Skips non-critical errors
- Click Load Data to Project

Step 6: Post-Processing & Validation
- The system validates the uploaded data
If successful:
- A success message is displayed
- Parcel data is added to the project
If errors occur:
- An error message is displayed
- Click View Error Log to review details
- Correct issues in the template and re-upload
Related Features/Next Steps:
FAQ/Troubleshooting:
Q: Can I use Import for project-level data?
A: No, this feature supports parcel-related data only.
Q: Can I upload Excel files with multiple sheets?
A: Yes, but you must select the correct worksheet before importing.
Q: What if some fields are not mapped automatically?
A: You must manually map them before loading data into the project.
Q: What happens if there are errors in the data?
A: The system will display an error message and prevent or allow import based on the selected option.
Q: What is the difference between Warn and Ignore?
A:
- Warn: Requires all errors to be fixed before import
- Ignore: Allows import by skipping non-critical errors
Q: How can I see detailed error information?
A: Click the View Error Log button to review specific issues.
Questions? Contact us!

Was this article helpful?
That’s Great!
Thank you for your feedback
Sorry! We couldn't be helpful
Thank you for your feedback
Feedback sent
We appreciate your effort and will try to fix the article