Purpose/Overview
The Bulk Data Upload feature allows users to import project data into the application using a structured Excel template. This is especially useful when migrating data from external systems or spreadsheets, reducing manual data entry and improving efficiency.
By using predefined templates and validation checks, the feature ensures that data is accurate, consistent, and aligned with system requirements before being imported.
Navigation Path:
To access this feature: Tools > Bulk Data Upload
Things to Know:
- Always download a new template for each upload session to ensure compatibility with the current environment.
- The template is environment-specific and contains predefined columns that must not be modified.
- All mandatory fields must be completed before uploading.
- Validation is performed before actual data migration.
- If the upload includes document imports, users must contact support for file handling.
Key Benefits/Use Cases:
- Data Migration from Legacy Systems: Easily transfer large volumes of project data from external systems into the application, reducing manual effort and errors.
- Bulk Project Setup: Quickly create multiple project records at once using structured Excel input, saving time during project initialization.
- Data Standardization and Validation: Ensure data consistency through predefined formats and validation checks before final import, improving data quality.
How It Works:
Follow these steps to setup or enable:
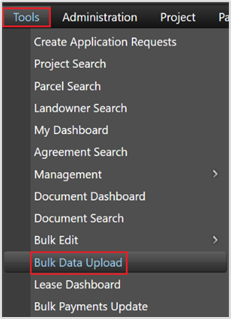
Step 1: Access the Bulk Data Upload Page
- Navigate to the Tools section in the main navigation menu.
- Select Bulk Data Upload.
- The Bulk Data Upload page opens with upload and job tracking options.
Step 2: Download the Migration Template
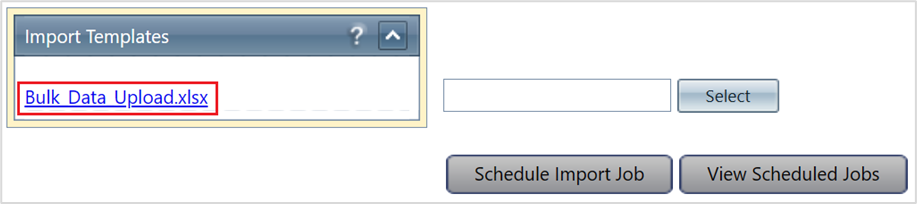
- On the Bulk Data Upload page, click the link to download the migration template.
- The file “Bulk_Data_Upload.xlsx” will be downloaded.
Step 3: Prepare the Data for Upload
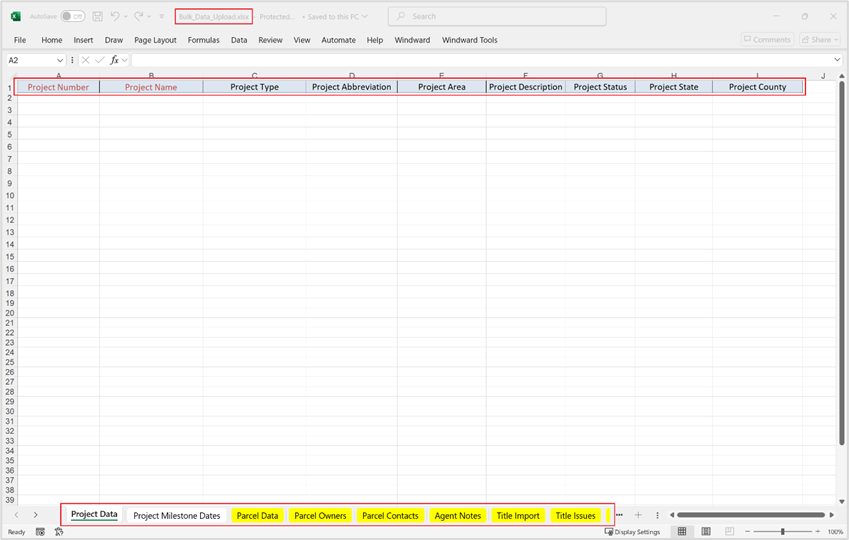
- Open the downloaded Excel file.
- Enter your project data:
- Follow the defined column formats.
- Complete all required fields.
- Save the file after entering the data.
Step 4: Upload the Data File
- Return to the Bulk Data Upload page.
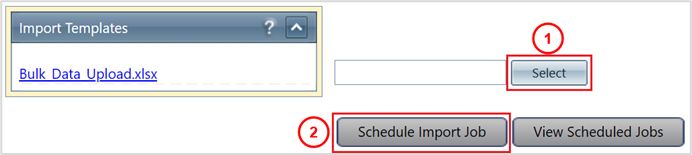
- Click Select in the upload field.
- Choose your completed Excel file.
- Click Schedule Import Job.
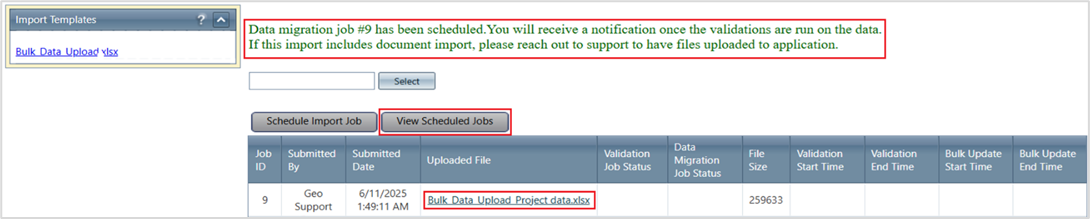
A confirmation message will appear indicating that the job has been scheduled and validation will begin.
Step 5: Monitor Job Status
- Click View Scheduled Jobs on the Bulk Data Upload page.
- Review the list of jobs (latest appears first).
Step 6: Address Validation Errors (If Applicable)
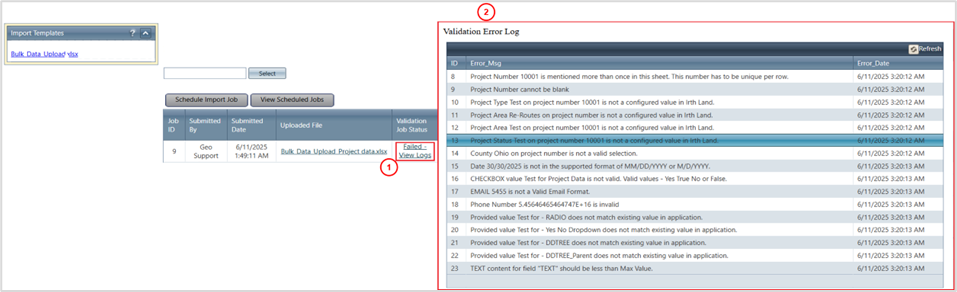
- If validation fails, click the link in the Validation Job Status column.
- Review the error details in the pop-up window.
- Correct the errors in the Excel file.
- Save and re-upload the file.
Step 7: Address Data Migration Errors (If Applicable)
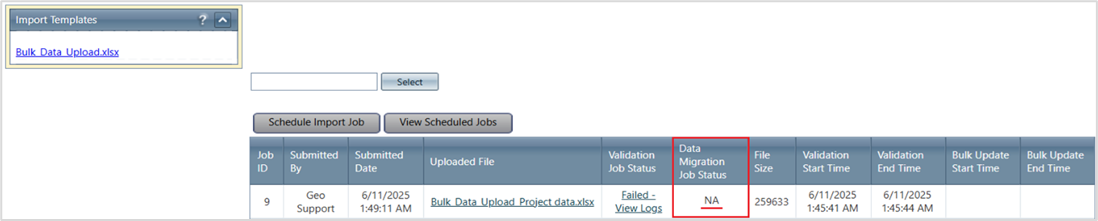
- If migration fails after validation, click the link in the Data Migration Job Status column.
- Review the error details.
- Fix the issues in the Excel file.
- Save and re-submit the file.
Related Features/Next Steps:
FAQ/Troubleshooting:
Q: Why should I download a new template every time?
A: Templates are environment-specific and may change. Using the latest template ensures compatibility and prevents upload errors.
Q: What happens if my file fails validation?
A: You will receive detailed error information. Correct the issues in the Excel file and re-upload it.
Q: What if validation passes but migration fails?
A: Review the migration error details, fix the issues in your file, and re-submit the upload.
Questions? Contact us!

Was this article helpful?
That’s Great!
Thank you for your feedback
Sorry! We couldn't be helpful
Thank you for your feedback
Feedback sent
We appreciate your effort and will try to fix the article