Purpose/Overview
This feature allows users to create, manage, and process workflow approvals using the Forms Panel. It enables structured data entry, document management, approval routing, time tracking, and workflow monitoring within a single interface.
It is designed to streamline approval processes, improve collaboration, and provide full visibility into workflow progress.
Navigation Path:
Access via:
- Project > Project Information > Project Details Tab > Project Forms Panel
- Parcel > Parcel Info > Parcel Information > Parcel Forms Panel
- Agreement/Lease Manager > Agreement Information > Agreement Forms Panel
- Customer Outreach > Ticket Information > Customer Outreach Forms Panel
Things to Know:
- Users must have appropriate permissions to create or manage workflows
- Workflow steps and fields are configured by administrators
- Submit for Review appears only when workflows are configured
- Only current step approvers can log time
- Time entries cannot be edited or deleted
- Color indicators:
- Orange: Workflow overdue
- Red: Workflow rejected
Key Benefits/Use Cases:
- End-to-End Workflow Management: Manage approvals, documents, notes, and tracking in one place
- Improved Collaboration: Enable multiple users (requestors, reviewers) to interact within workflows
- Audit & Tracking: Maintain complete visibility of actions, approvals, and history
How It Works:
1. Creating & Managing Workflow Approvals
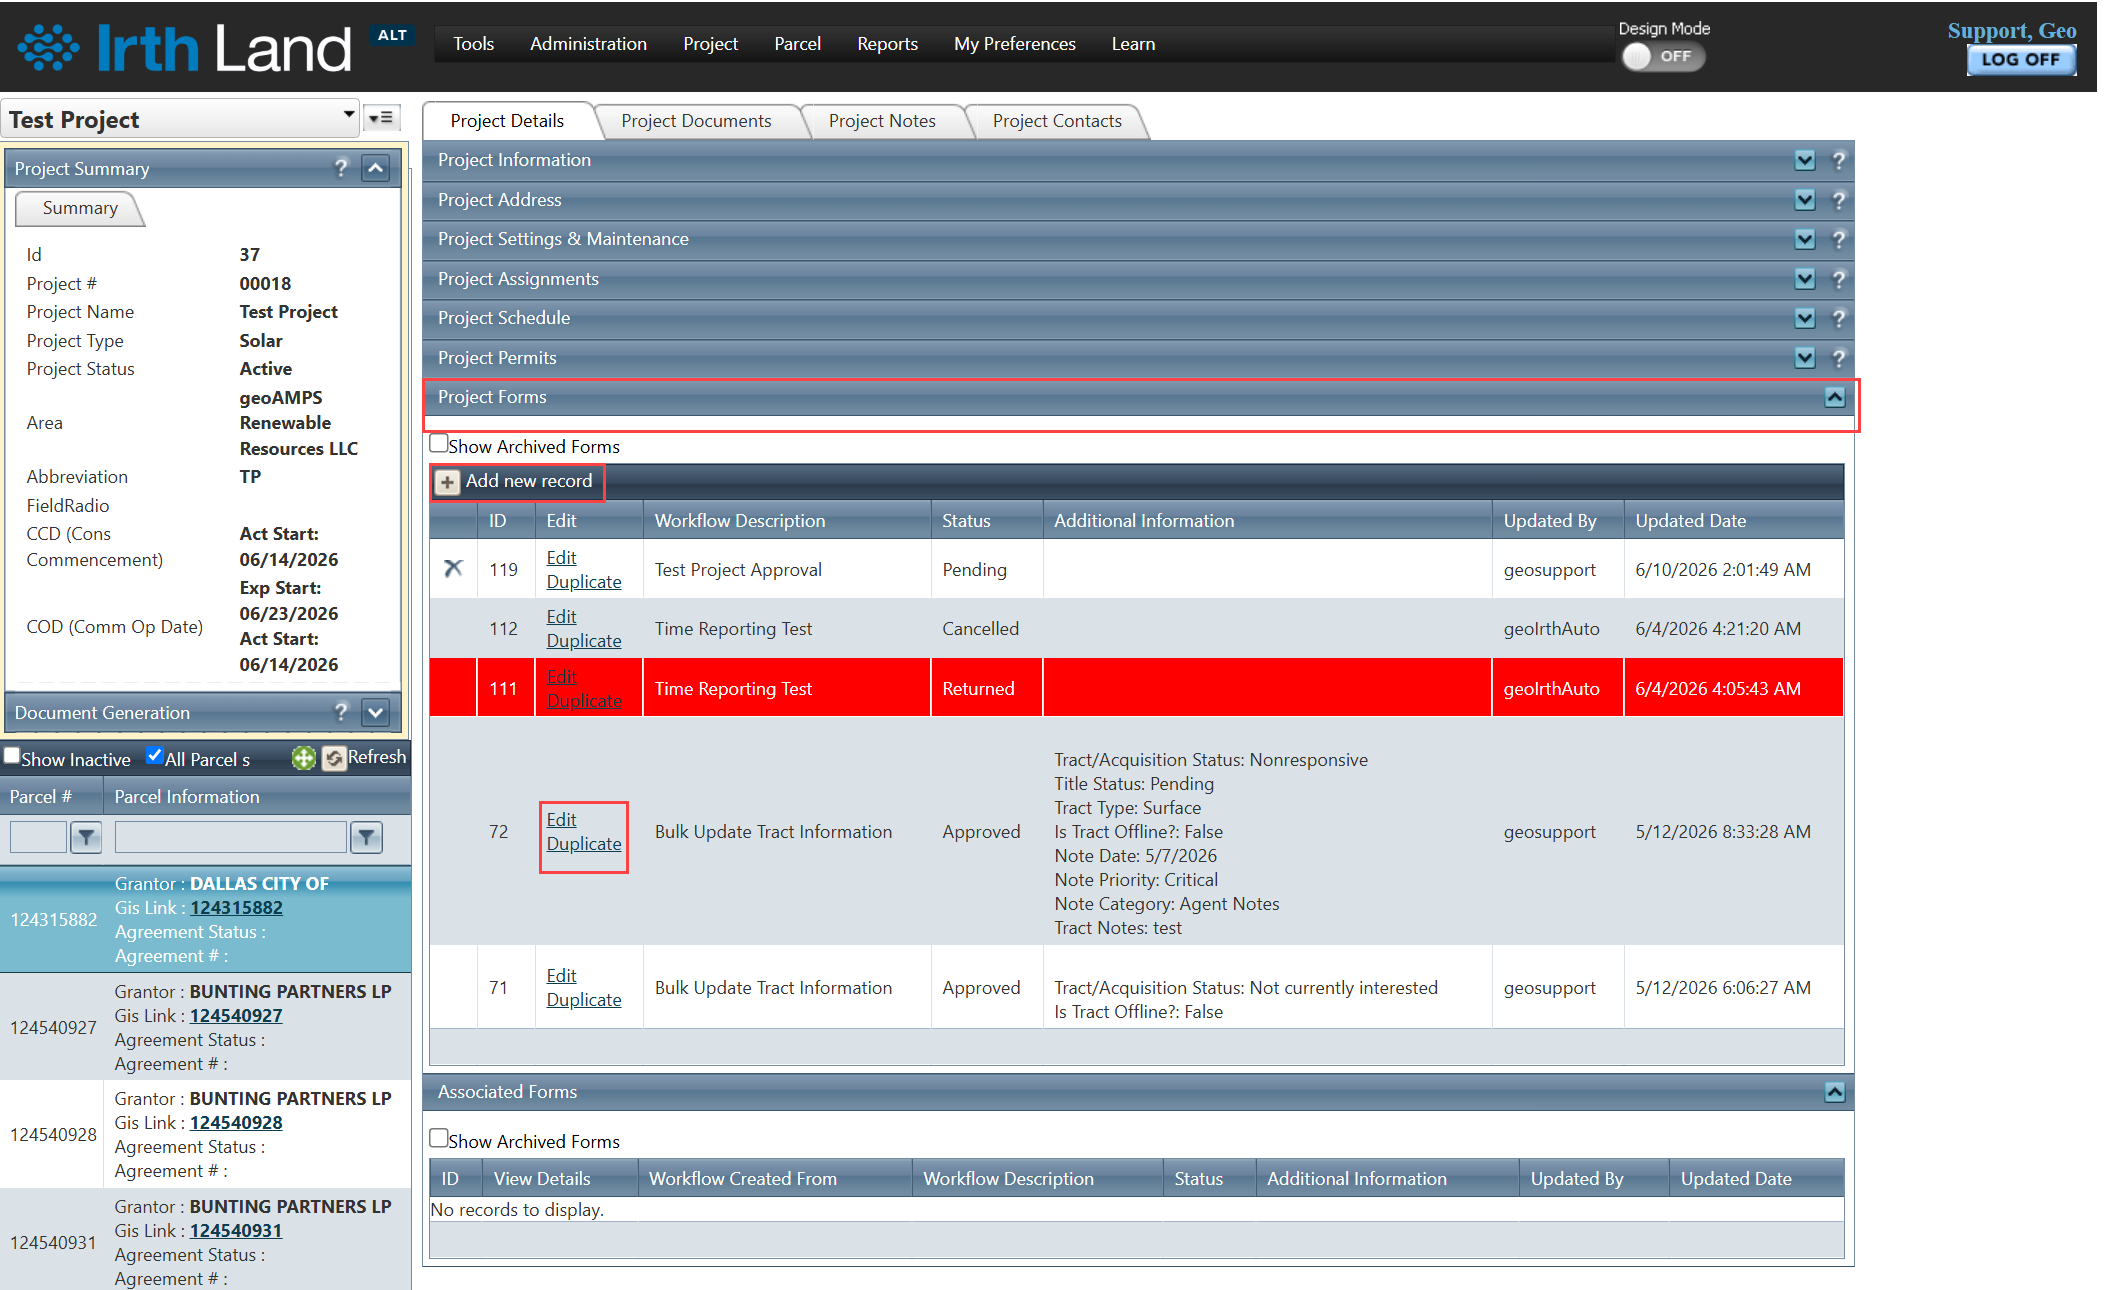
Step 1: Click Add New Record to create a workflow
Step 2: Use Edit to modify existing workflows
Step 3: Use Duplicate to copy existing workflows
2. Using the Approvals Tab
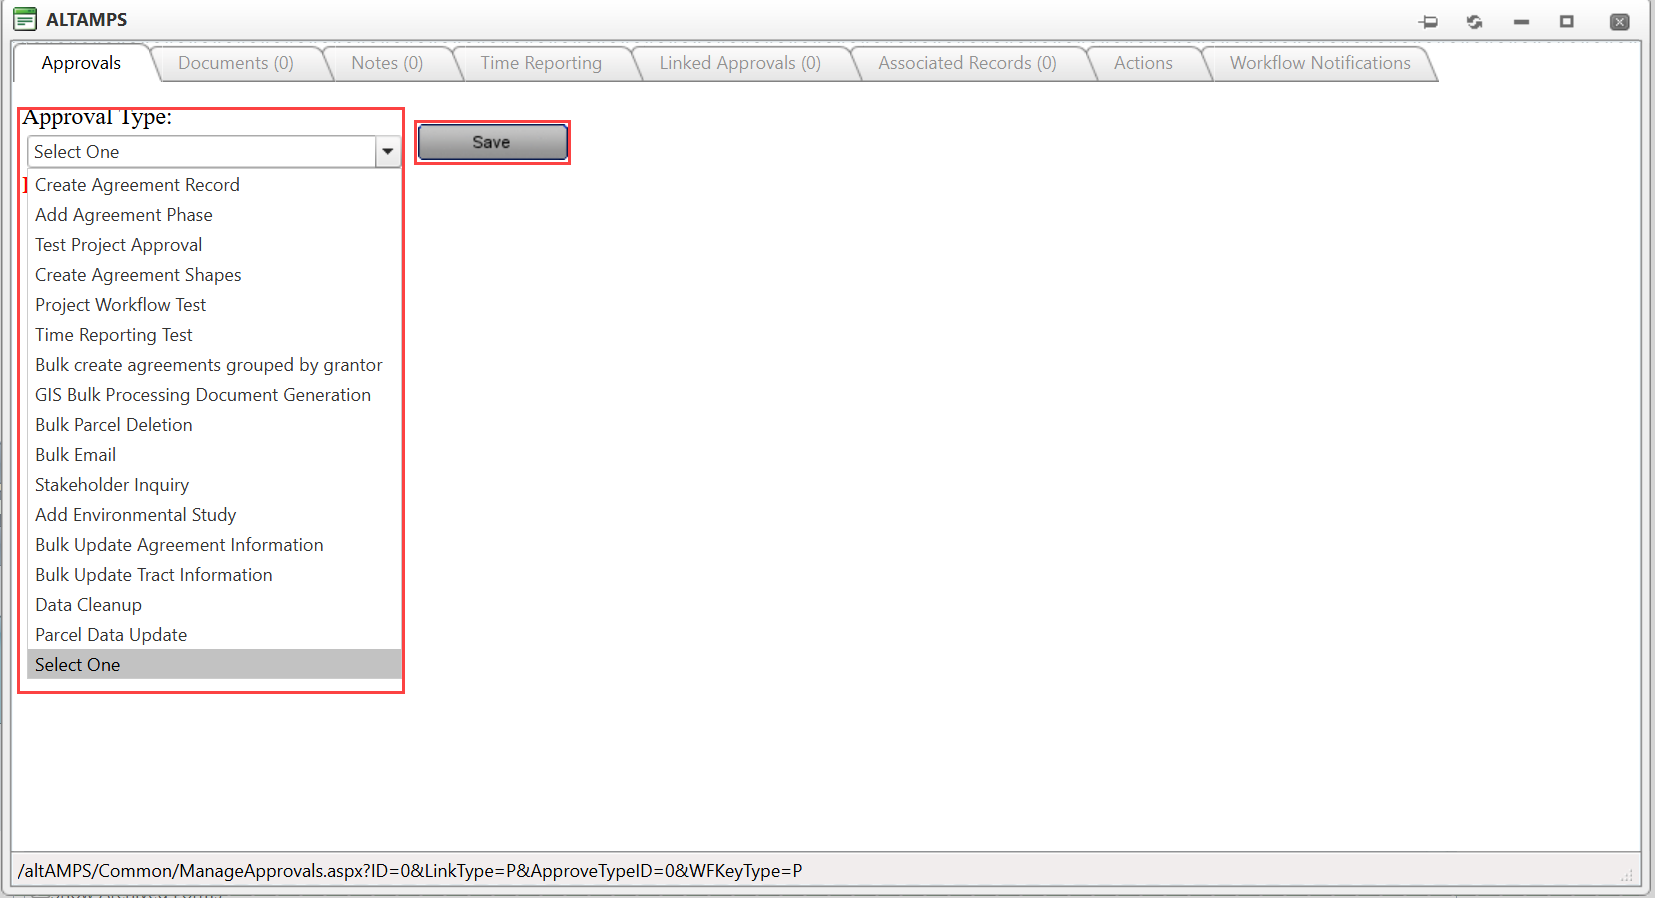
Step 1: Select workflow from Approval Types dropdown
Step 2: Select associated workflows (if required)
Step 3: Fill out custom fields
Step 4: Click Save → Click Submit for Review
3. Managing Workflow Documents
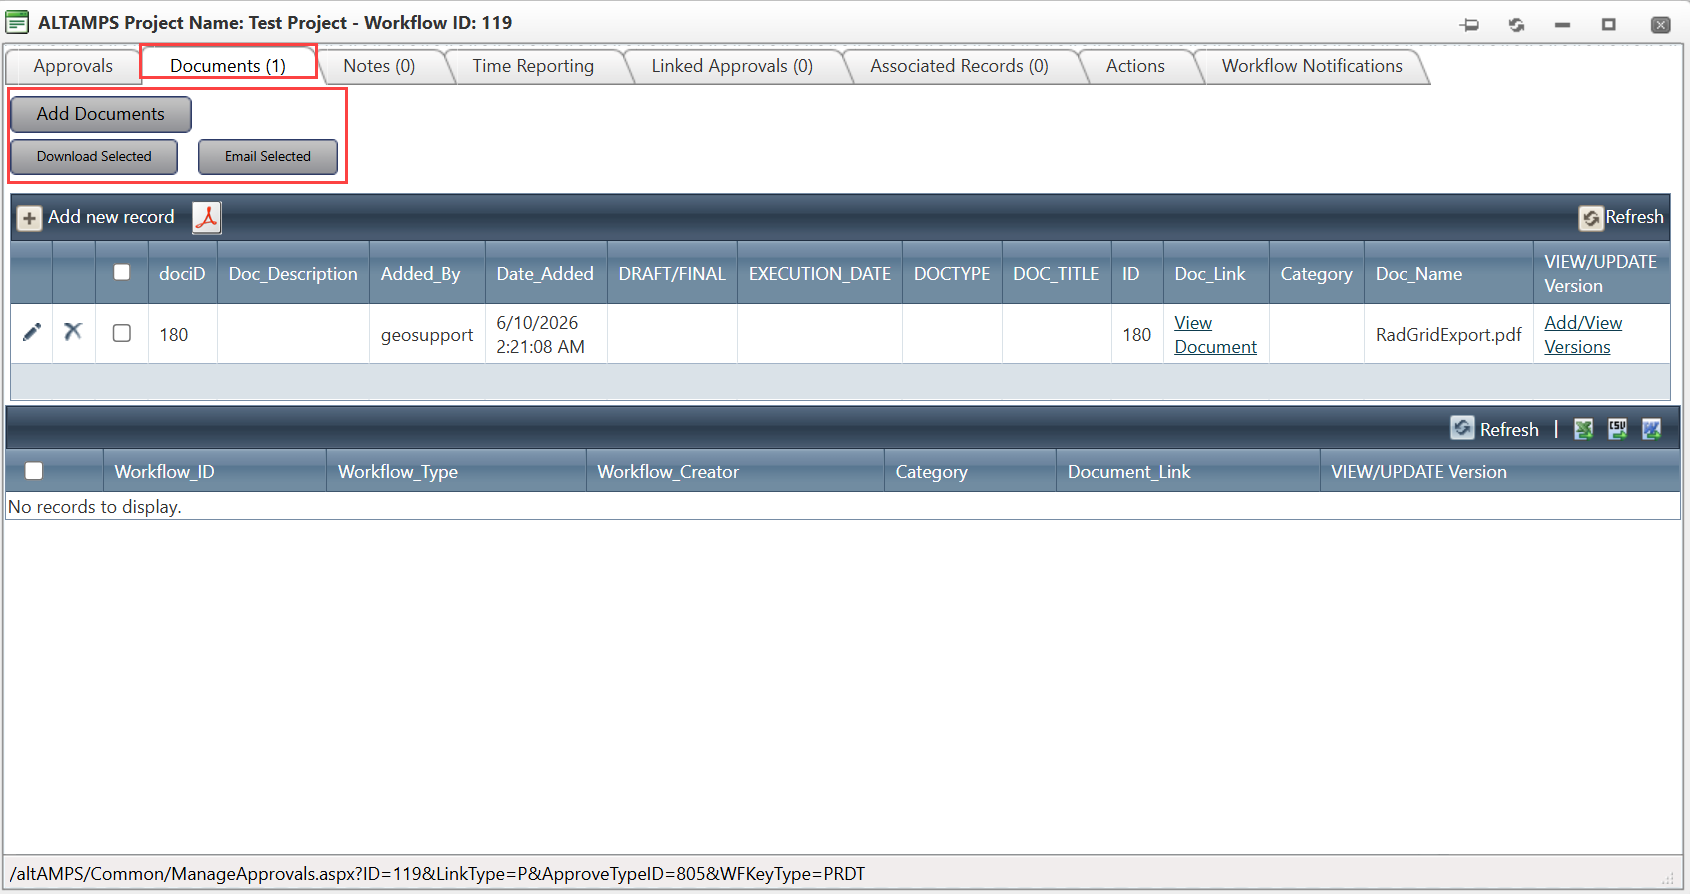
Step 1: Go to Documents Tab → Click Add Documents
Step 2: Upload files (External Documents) or add links (External Link)
Step 3: Use options to download, email, or view documents
Step 4: Use Add/View Versions for version control
4. Adding Notes to Workflow
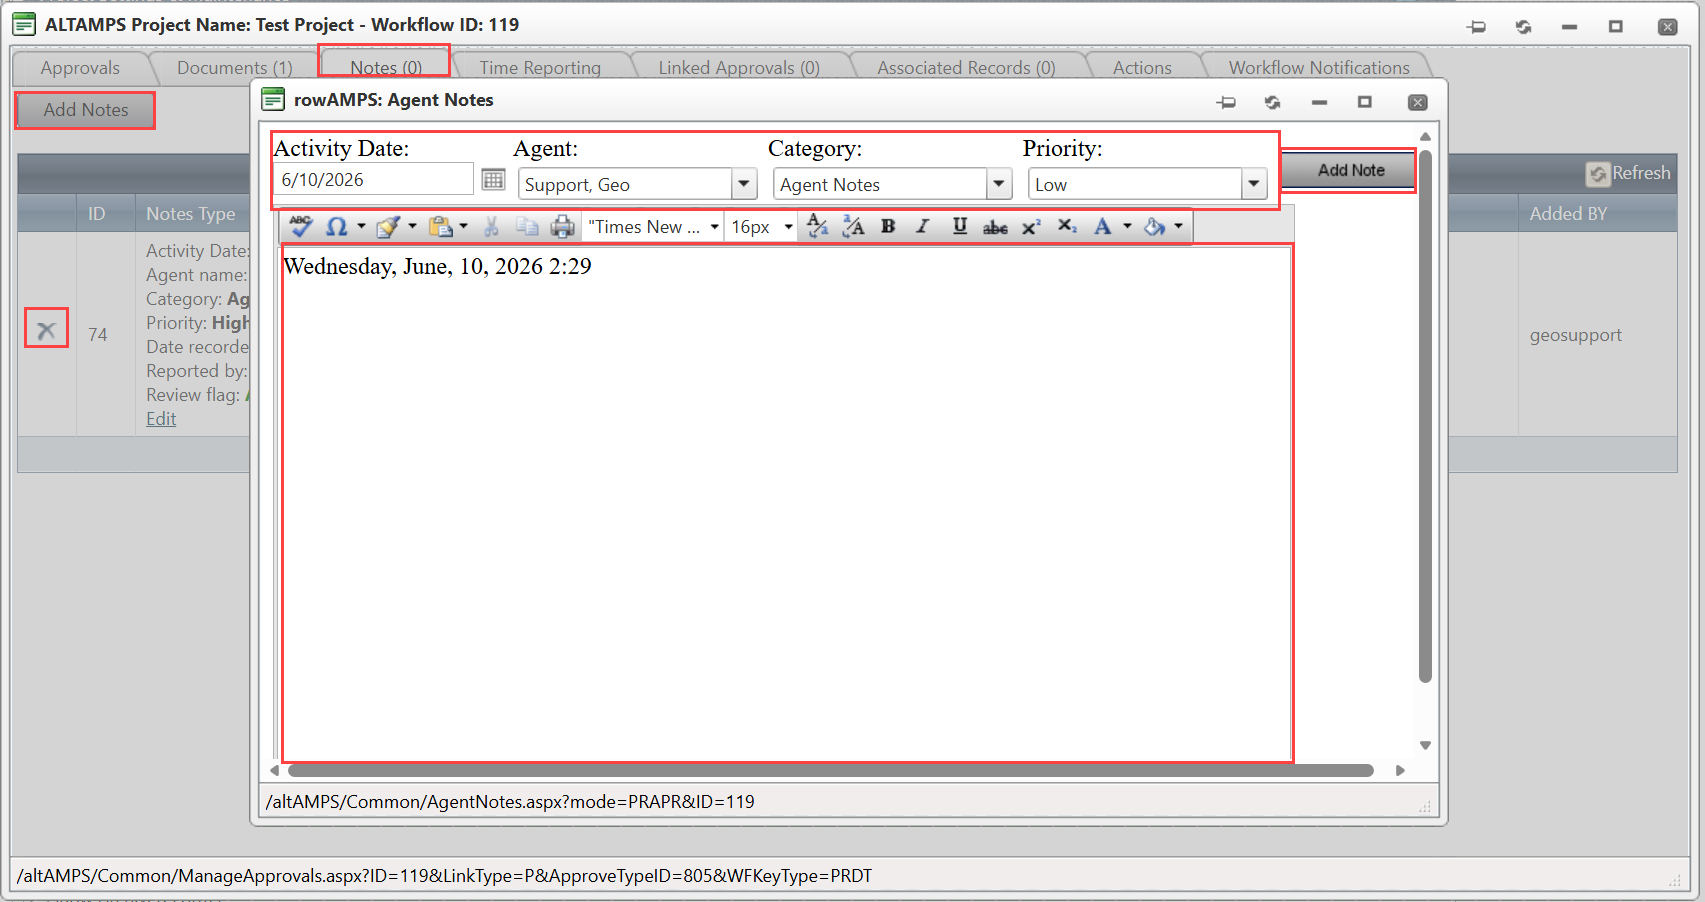
Step 1: Go to Notes Tab → Click Add Notes
Step 2: Enter details → Click Add Note
Step 3: Use X icon to delete notes
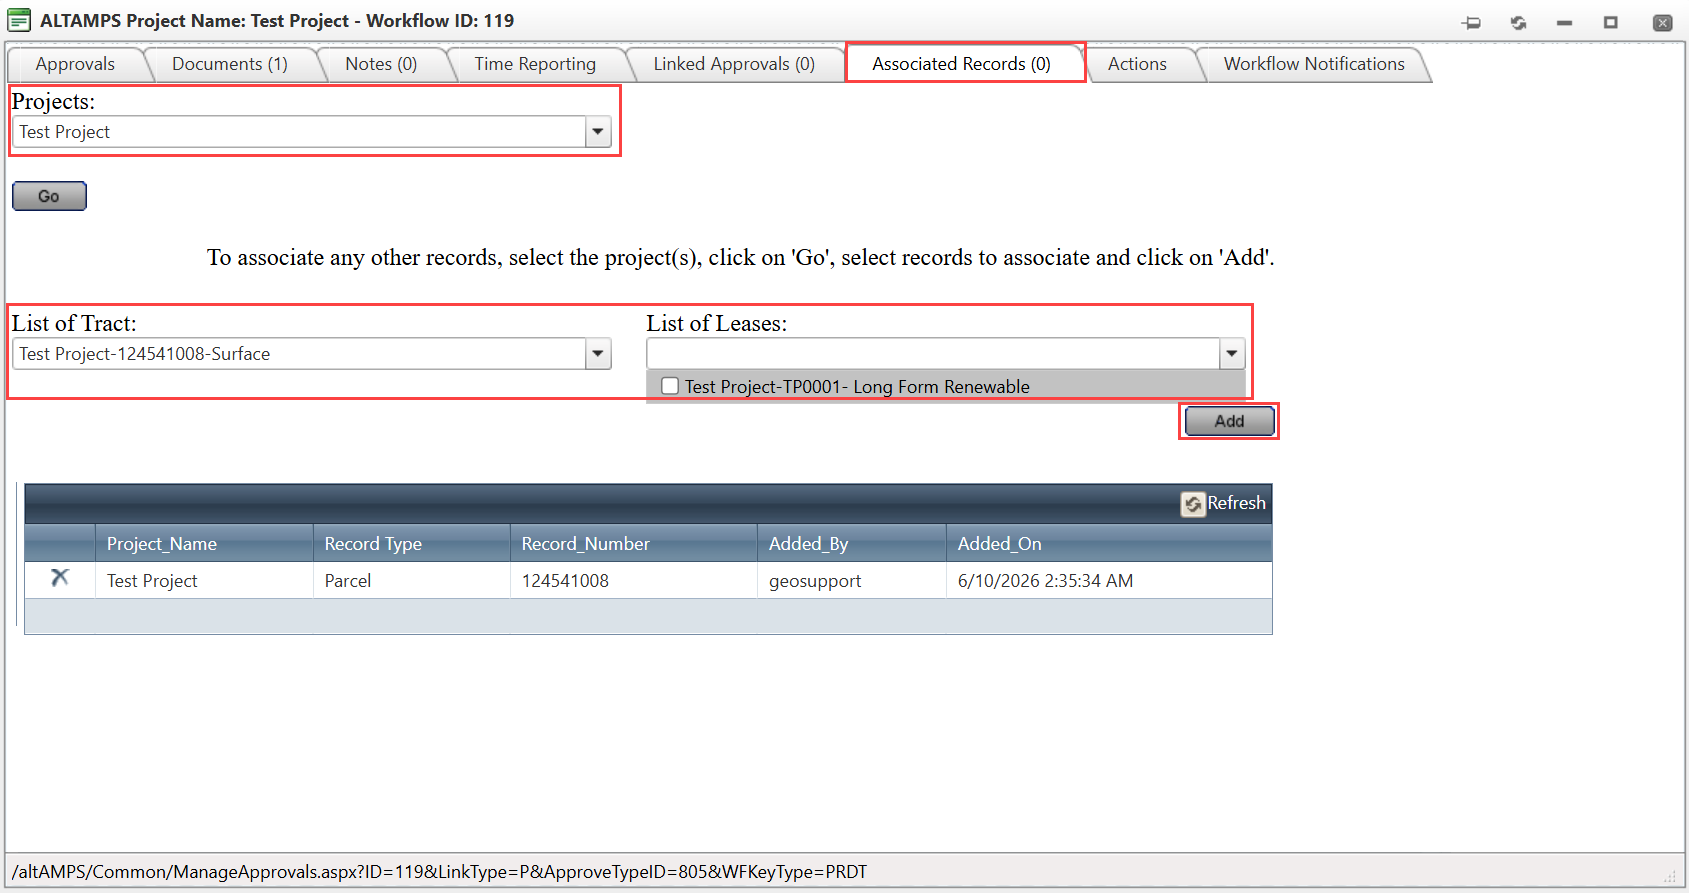
5. Associating Records to Workflow
Step 1: Go to Associated Records Tab
Step 2: Select project, tracts, or leases
Step 3: Click Add
Step 4: Click Submit for Review (if applicable)
6. Time Reporting on Workflow
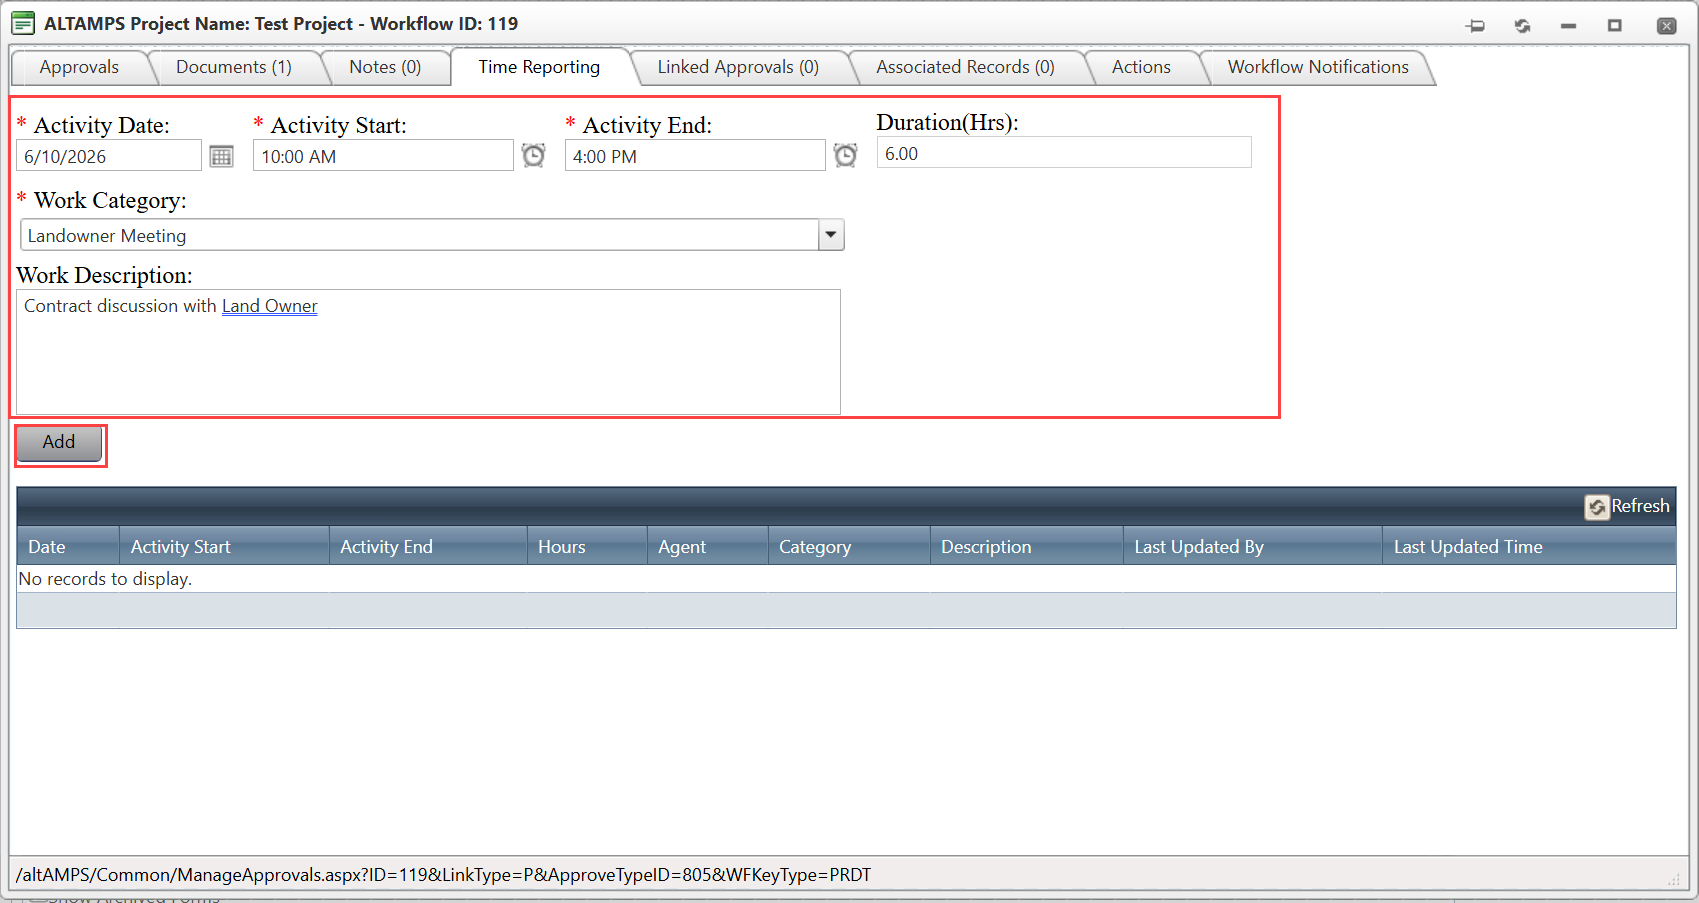
Step 1: Open workflow → Go to Time Reporting Tab
Step 2: Click Add
Step 3: Enter:
- Activity Date
- Start & End Time
- Work Category
- (Optional) Description
Step 4: Click Add (Duration auto-calculated)
7. Workflow Tracking & Monitoring
- Use Actions Tab to view approval history
- Use Workflow Notification Tab to track notifications
- Use Linked Approvals Tab to view related workflows
Related Features/Next Steps:
FAQ/Troubleshooting:
Q: Why can’t I see the Submit for Review button?
A: It appears only after saving and when approval steps are configured.
Q: Can reviewers upload documents?
A: Yes, reviewers can upload and view documents.
Q: Can time entries be edited or deleted?
A: No, time entries cannot be modified after creation.
Q: What does orange or red status indicate?
A: Orange indicates overdue workflows; red indicates rejected workflows.
Q: Can I remove associated records?
A: Yes, using the X icon in the grid.
Questions? Contact us!

Was this article helpful?
That’s Great!
Thank you for your feedback
Sorry! We couldn't be helpful
Thank you for your feedback
Feedback sent
We appreciate your effort and will try to fix the article