Enabling Photo AI Module by Folder
Purpose/Overview
In this article, you will learn how to enable or disable the Photo AI module by folder within Utilisphere. This feature allows system administrators to control where the Photo AI module is available, either across all ticket folders or limited to specific ones. This flexibility helps organizations tailor AI-powered photo analysis to relevant workflows, improving efficiency, accuracy, and control over how AI is used within ticket processing.
Navigation Path:
To access this feature: Utilisphere > System Management > AI Projects > AI Project Info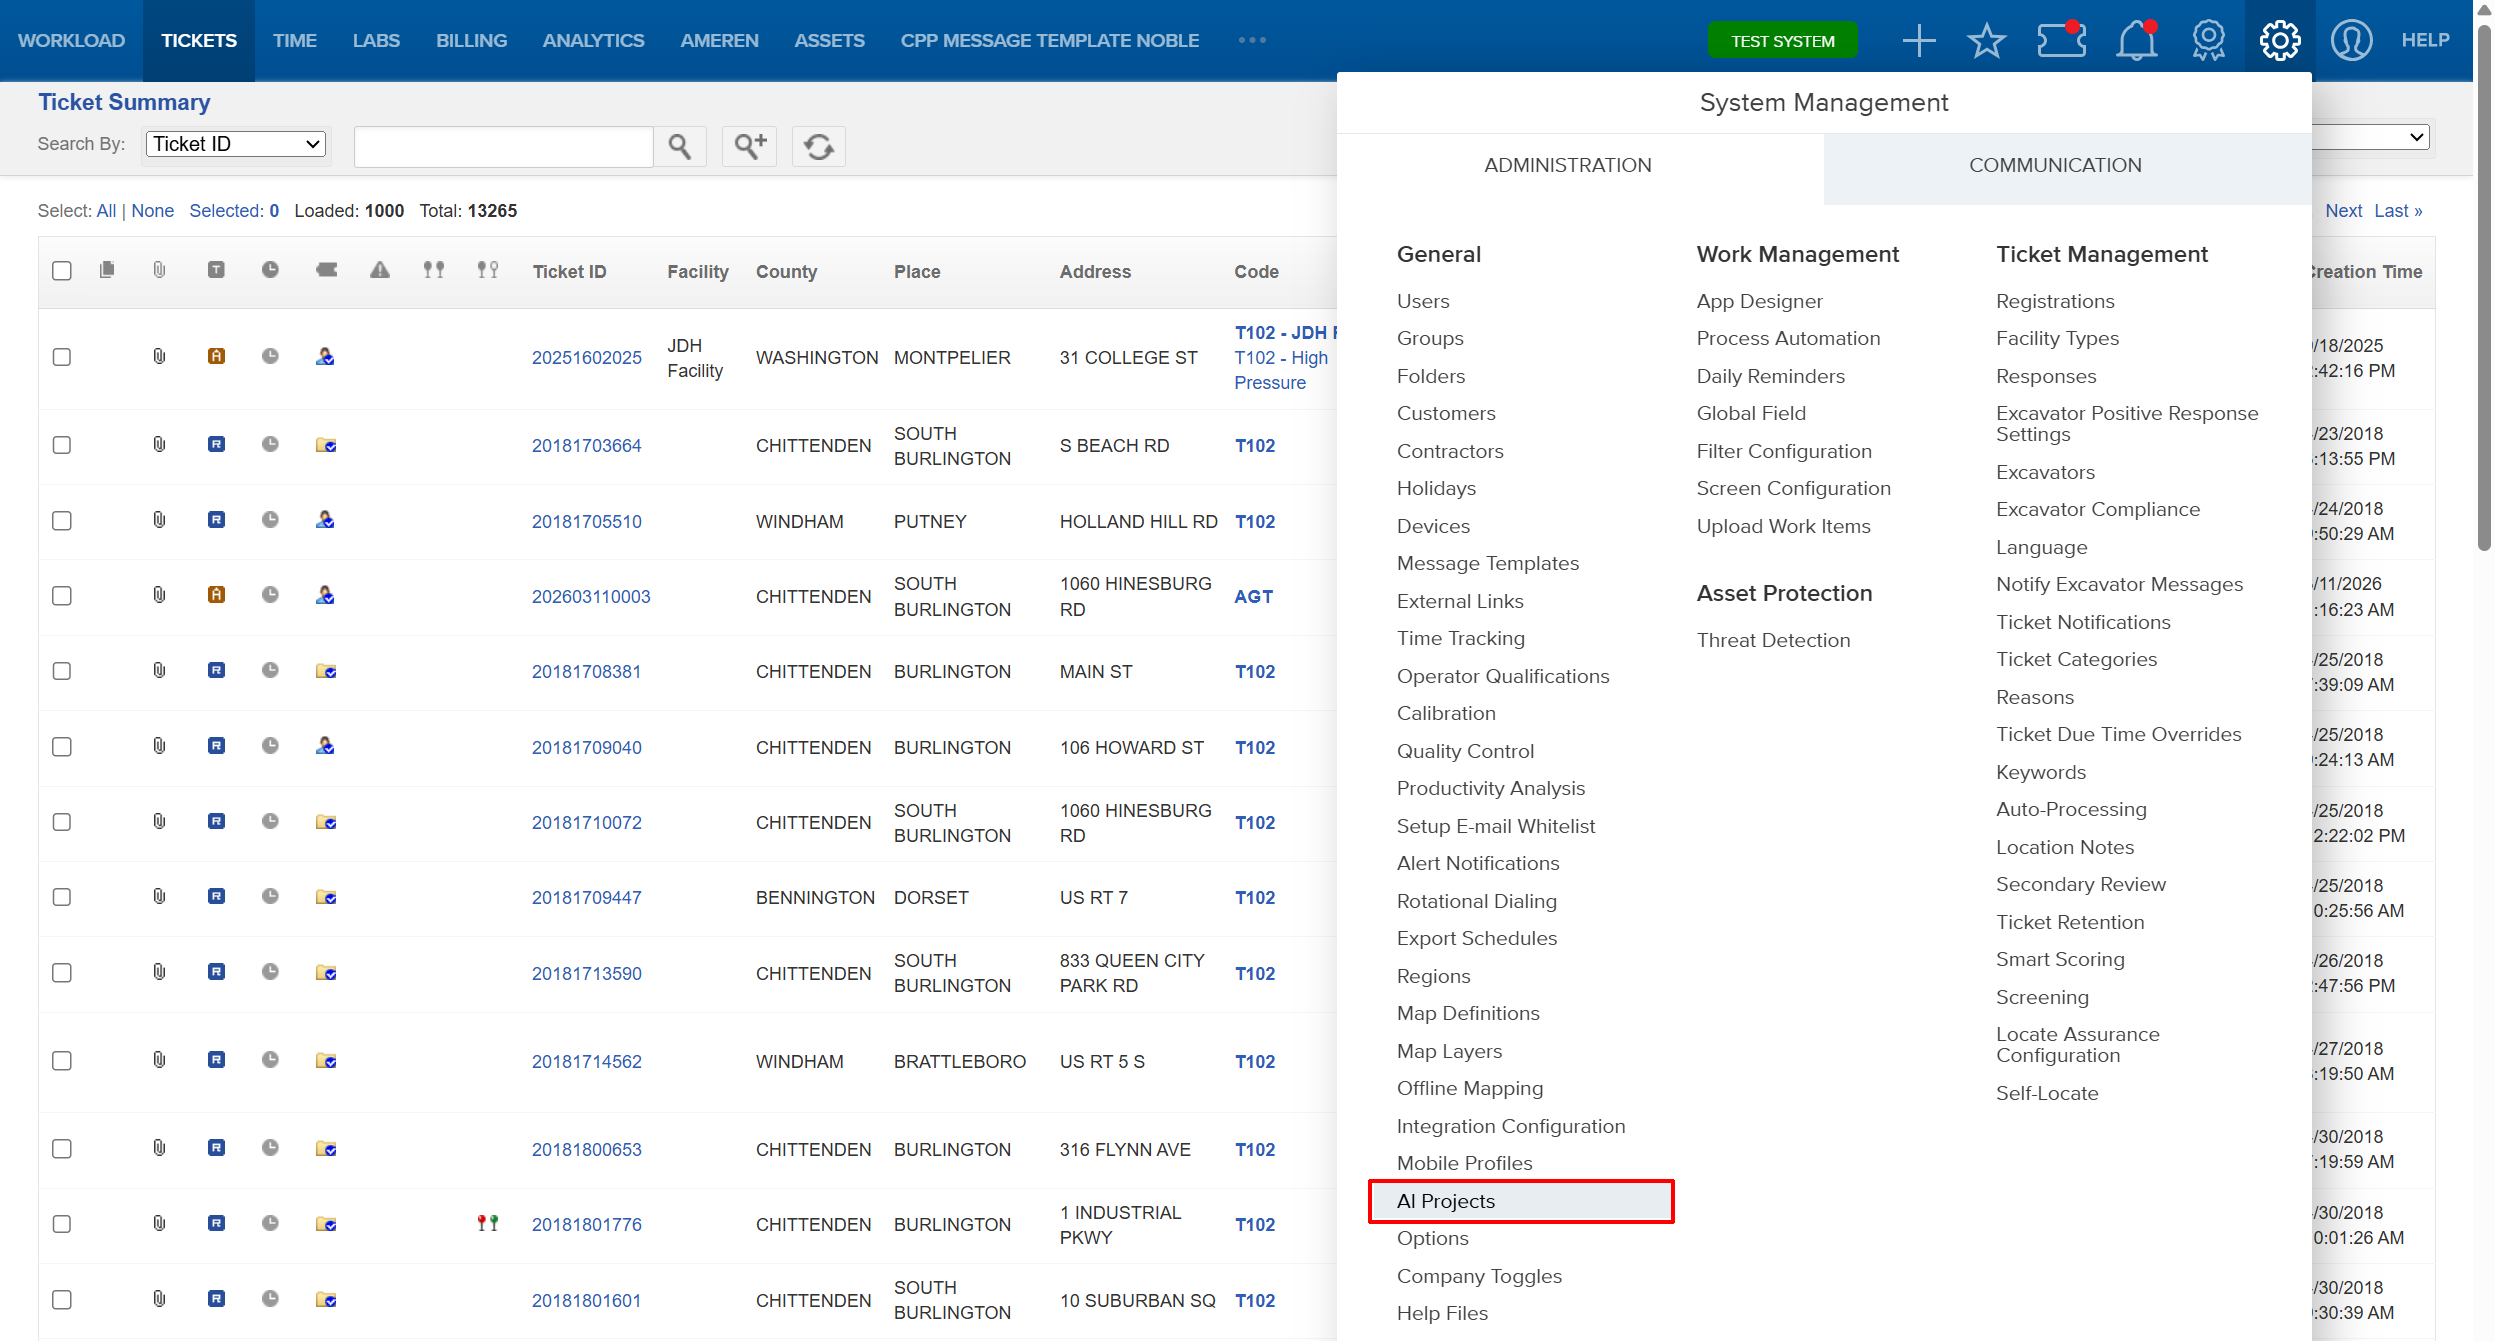
Things to Know:
- Only users with administrative permissions can configure Photo AI module settings.
- The Photo AI module can be enabled for:
- All folders, or
- Only selected folders
- Changes apply immediately after saving.
- End users can only access Photo AI results in folders where the feature is enabled.
- A photo must be attached to a ticket for the Photo AI module to process results.
Key Benefits/Use Cases:
- Target AI Usage by Workflow: Enable Photo AI only for relevant folders to ensure it is used where it adds the most value.
- Improve Ticket Analysis: Enhance accuracy and efficiency by leveraging AI-generated insights from uploaded images.
- Control Feature Availability: Restrict AI functionality to specific teams or processes for better governance and performance optimization.
How It Works:
Follow these steps to set up or enable the Photo AI module by folder:
Configure Folder Settings
- Navigate to System Management > AI Projects > Modify AI Project
Choose one of the following options:
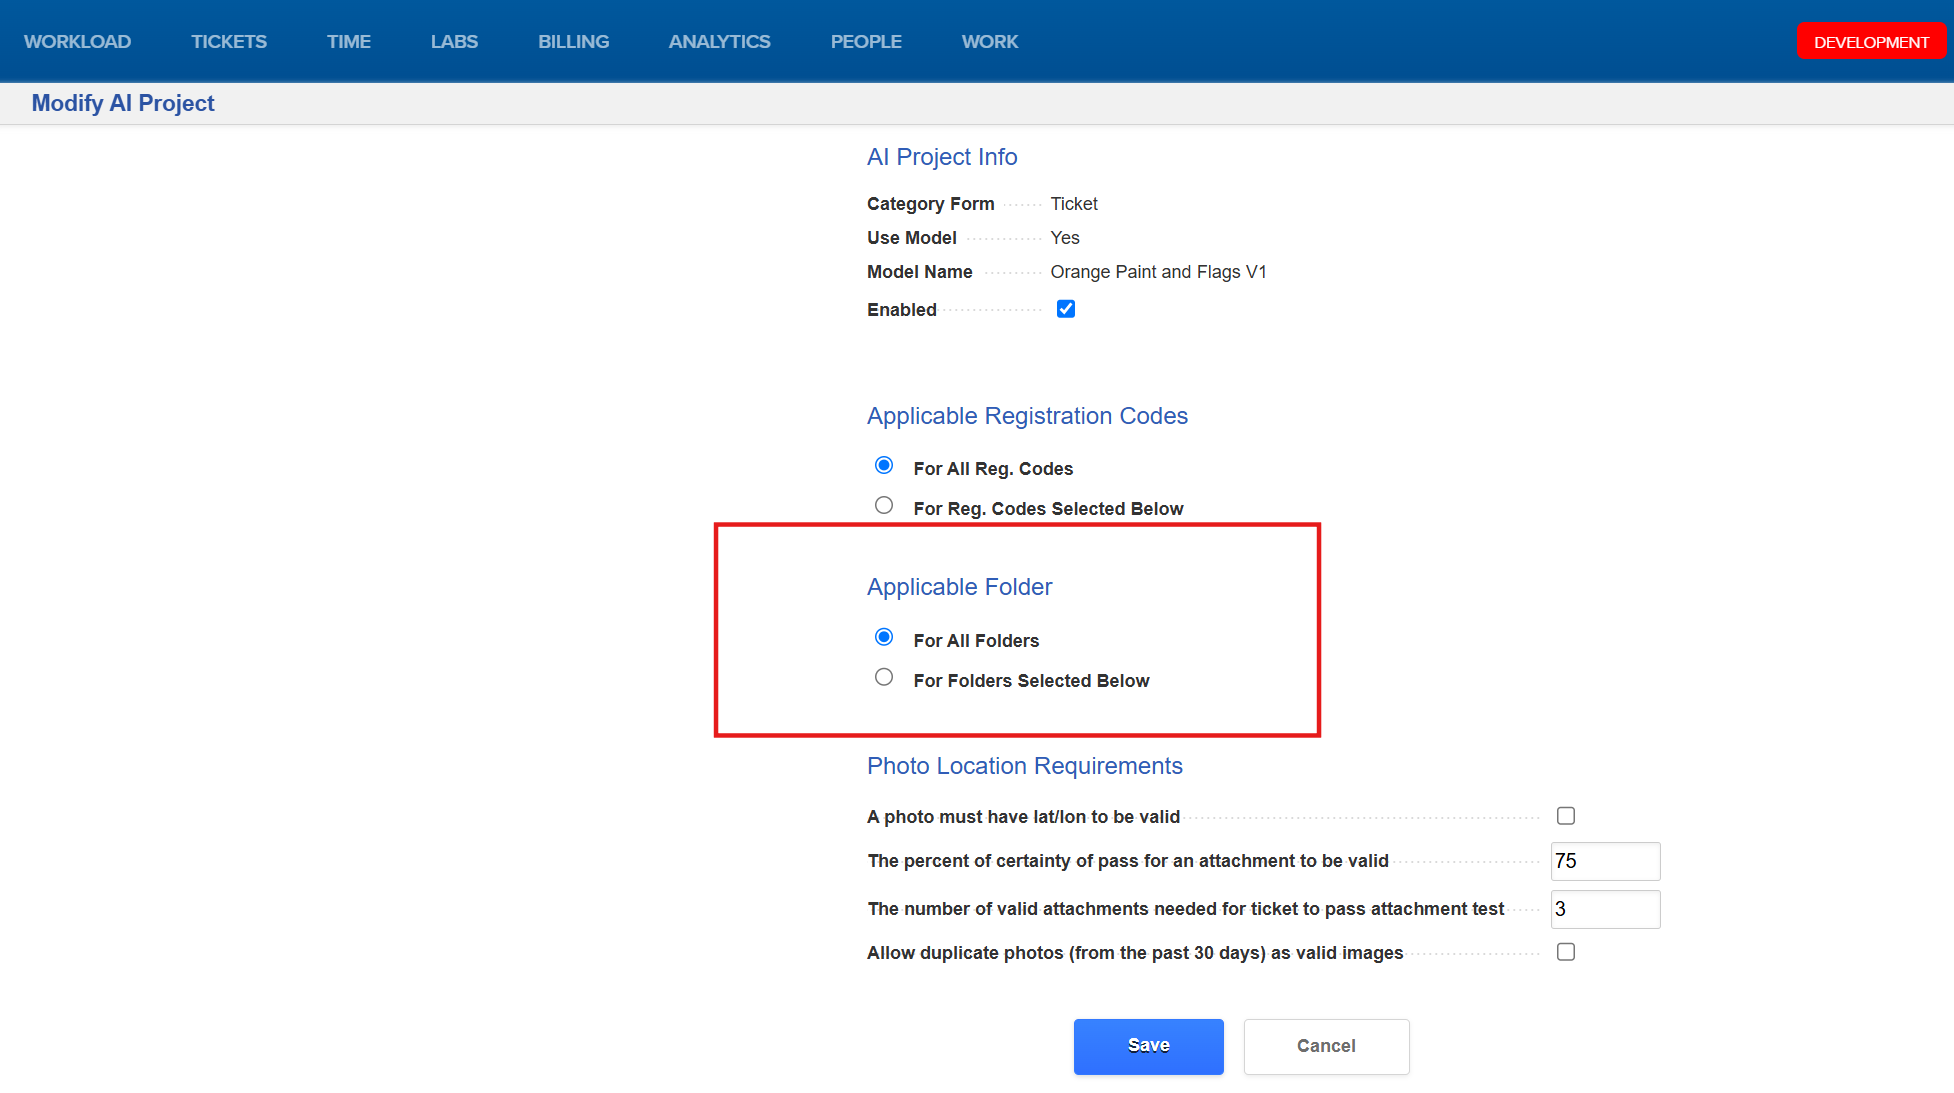
- For All Folders: Enables Photo AI for all ticket folders.
- For Folders Selected Below: Enables Photo AI only for selected folders.
If selecting specific folders:
- Check the boxes next to the folders where Photo AI should be enabled.
Click Save to apply your configuration.
Validate Photo AI Usage (Optional)
- Navigate to the Ticket Summary page.
- Open a ticket and use the Add Photo option.

- Upload a photo and confirm it is attached.
- View Photo AI results in the attachment viewer or through screen configuration (if enabled).
FAQ/Troubleshooting:
Q: Why don’t I see Photo AI results on a ticket?
A: Confirm that the folder the ticket belongs to has Photo AI enabled and that a photo has been successfully attached.
Q: Can I enable Photo AI for only certain folders?
A: Yes, select For Folders Selected Below and choose the specific folders during configuration.
Q: Why can’t I access the AI Project settings?
A: You must have administrative permissions to view and modify AI Project configurations.
Questions? Contact us!

Was this article helpful?
That’s Great!
Thank you for your feedback
Sorry! We couldn't be helpful
Thank you for your feedback
Feedback sent
We appreciate your effort and will try to fix the article