Purpose/Overview
The My Dashboards feature serves as a centralized workspace where users can manage system notifications, assignments, communication, and document requests in one place. It helps streamline daily activities by providing quick access to messages, tract assignments, and notes requiring action.
This feature is intended for all system users who need to track assignments, collaborate with team members, and manage workflows efficiently. It improves productivity by reducing the need to navigate across multiple modules and ensures timely action on tasks and communications.
Navigation Path:
To access this feature: Tools > My Dashboard
Things to Know:
- Users are automatically redirected to My Dashboard upon login.
- The dashboard can also be accessed by clicking the logo at the top-left corner of any screen.
- Notification preferences (Email, Dashboard, or Both) can be configured via:
My Preferences > Manage Preferences > Notification Preferences - Some system messages are action-based and will be removed automatically upon completion; these cannot be manually removed.
- Export options are available for messages and assignments in multiple formats (Excel, CSV, Word, PDF).
Key Benefits/Use Cases:
- Centralized Task Management: Users can view assignments, notifications, and messages in one place, ensuring no critical updates are missed.
- Efficient Communication: Built-in messaging allows seamless interaction between users without relying on external email systems.
- Workflow Tracking: Users can easily review, approve, edit, and track notes, improving process visibility and turnaround time.
How It Works:
Dashboard Layout
The My Dashboard screen is divided into two main areas:
Left Panel: Favorite Link and Quick Links
Central Panel: Displays data based on the selected option (e.g., Inbox, Requested Documents, My Projects)
Favorite Links - This section provides quick access to frequently used actions such as:
- My Approvals
- My Requests
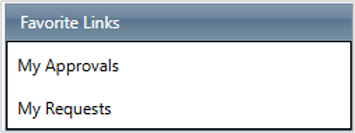
These links allow users to directly navigate to approval workflows and request tracking without additional navigation steps.
Quick Links - This section includes:
- Inbox
- Requests Documents
- My Project
- My Parcel (Only ROW)
- Notes to Review (Only ROW)
- Notes to Edit (Only ROW)
- Deleted Docs (Only ROW)
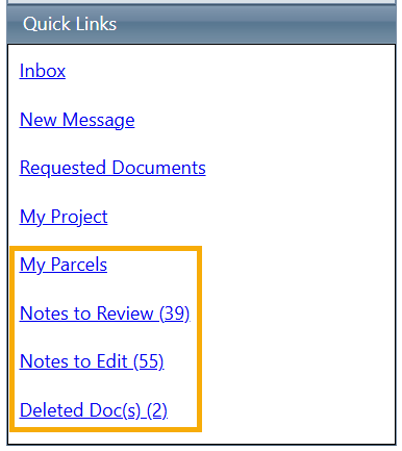
Selecting any of these links dynamically updates the Central Panel (main content area).
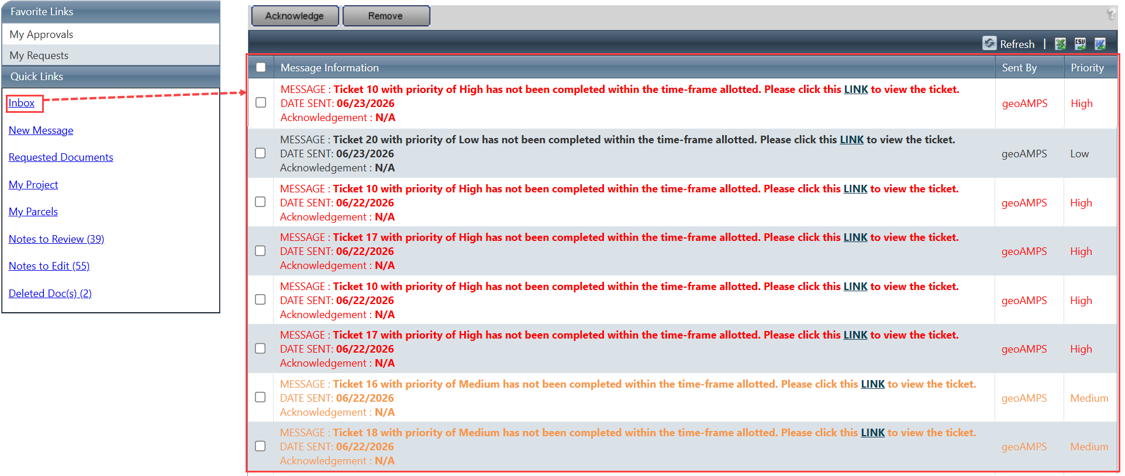
Inbox (Default View)
The Inbox is displayed by default upon login.
It shows a list of system-generated messages and notifications with the following details:
- Message Information (including alerts, errors, and updates)
- Date Sent
- Acknowledgement Status
- Sent By
- Priority (e.g., Medium)
Users can:
- Select messages using checkboxes
- Perform actions such as Acknowledge or Remove
- Use the Refresh option to reload the latest notifications
Messages may include:
- Ticket updates (e.g., incomplete tasks, assignment alerts)
- System errors with summaries
- Links to navigate directly to related records
Sending Messages to System Users
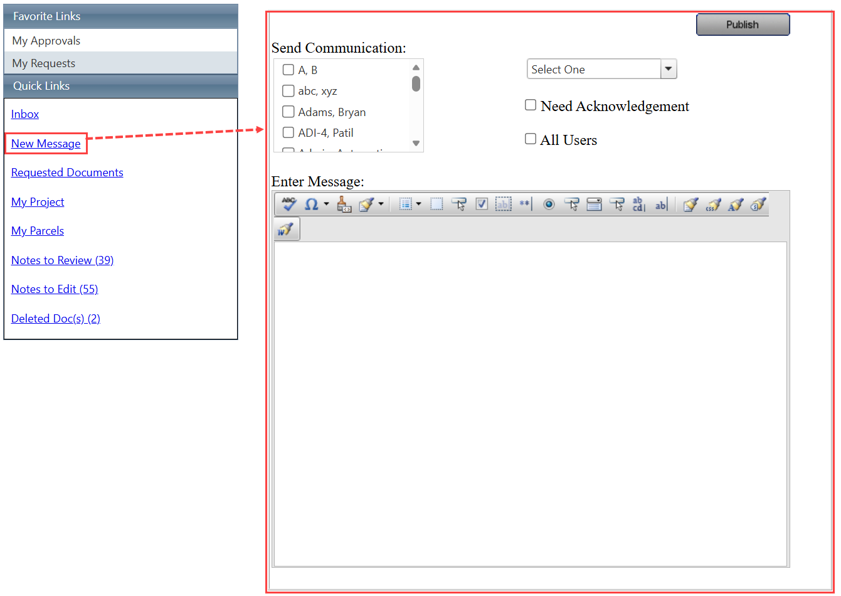
Users can send messages to other users within the application using the New Message tab, functioning as a system email.
Steps:
- Select the message priority (Low, Medium, High).
- Choose a recipient from the Send Communication list.
- (Optional) Check Need Acknowledgement to receive confirmation.
- (Optional) Select All-Users to send the message to all users.
- Enter the message content.
- Click Publish to send the message.
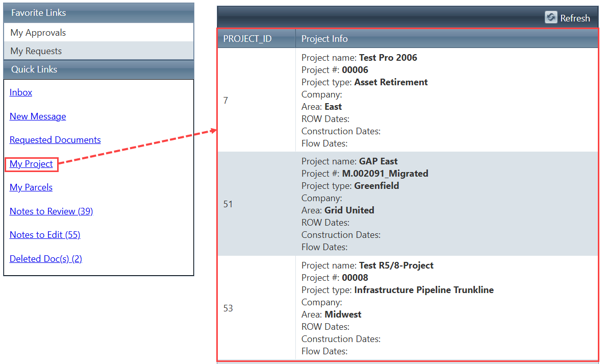
My Project
Displays all projects assigned to the logged-in user. The layout allows users to review key project details directly from the dashboard without navigating to a separate module.
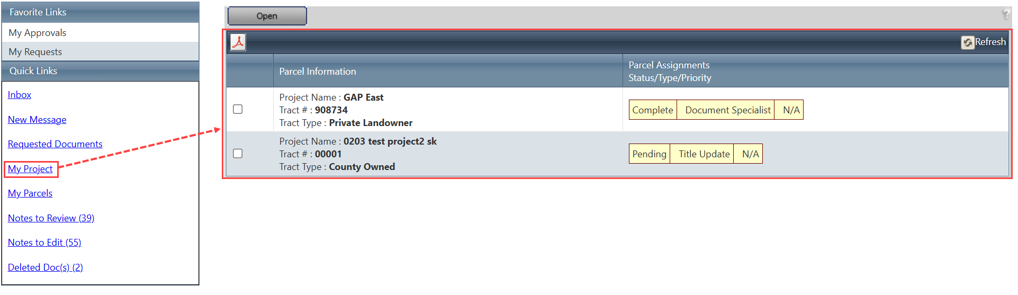
My Parcel (Only ROW)
Displays all parcels assigned to the logged-in user. The layout allows users to review key parcel details directly from the dashboard without navigating to a separate module. Parcel assignments details for projects can be exported to a PDF by clicking  icon.
icon.
Reviewing Notes (Only ROW)
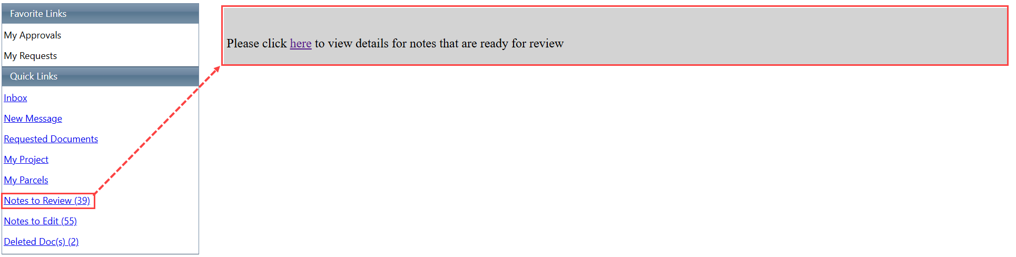
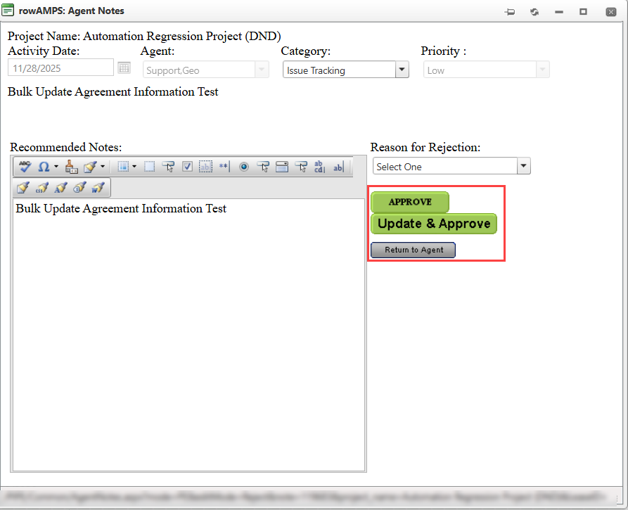
Displays list of all notes which are under review for logged in user. The number of notes pending for review will be displayed in parenthesis next to the label in left grid.
Steps:
- Click the Notes to Review tab.
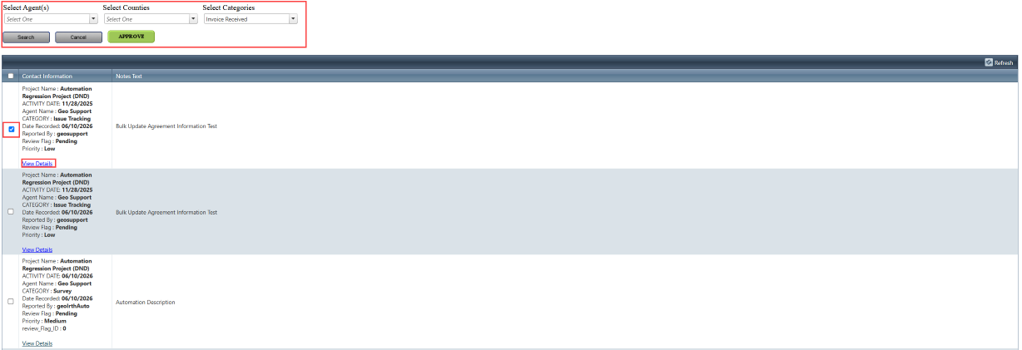
- Apply filters (Agents, Counties, Categories) and click Search.
- Select the note(s) using checkboxes.
- Click Approve to approve notes.
- Click View Details to review full information and approve/reject.
Notes:
- Notes can be reviewed individually or in bulk.
- Rejected notes are returned to the agent and moved to Notes to Edit.
Editing Notes (Only ROW)
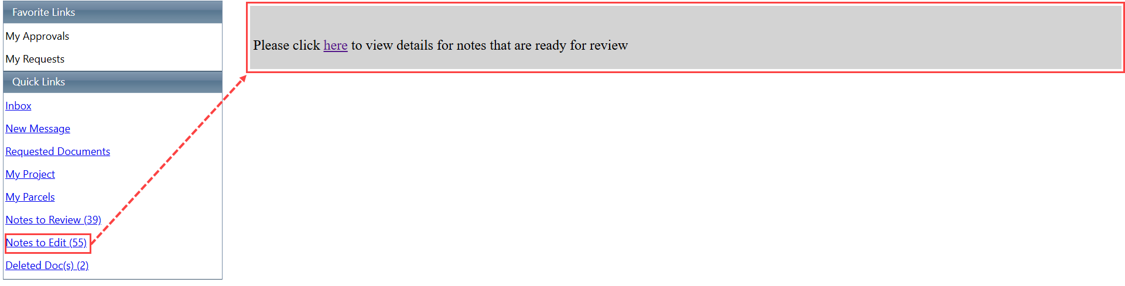
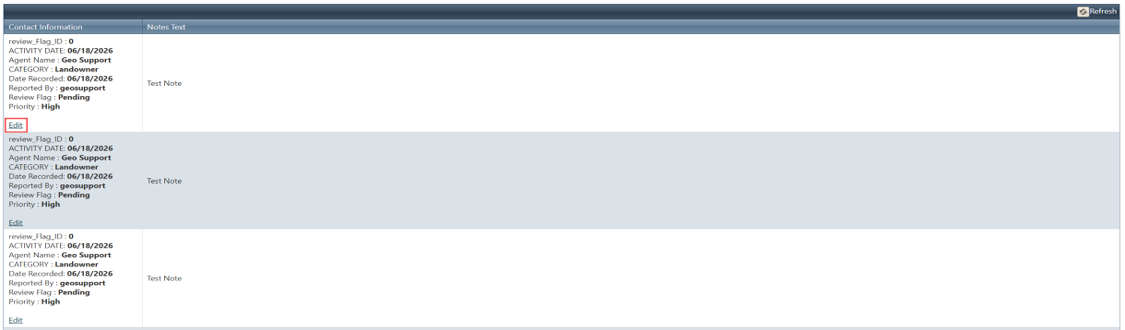
Any notes users have entered that are pending approval, or have been rejected and updated, will be displayed under Notes to Edit. The number of notes available for editing will display in parenthesis next to the label ‘Notes to Edit’ in left grid view.
Steps:
- Click the Edit hyperlink to open note details.
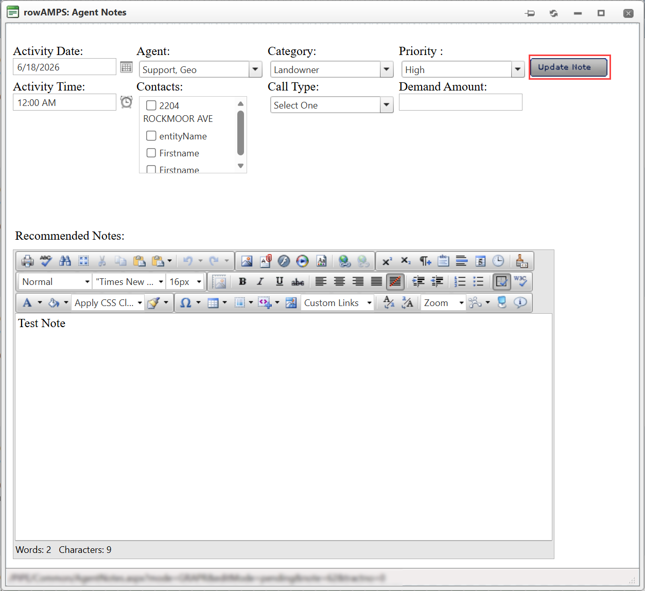
- Make necessary updates.
- Click Update Note.
- Use View Document to access attachments.
- Check the Review Flag for status updates.
Notes:
- Rejected notes appear in red and must be updated before resubmission.
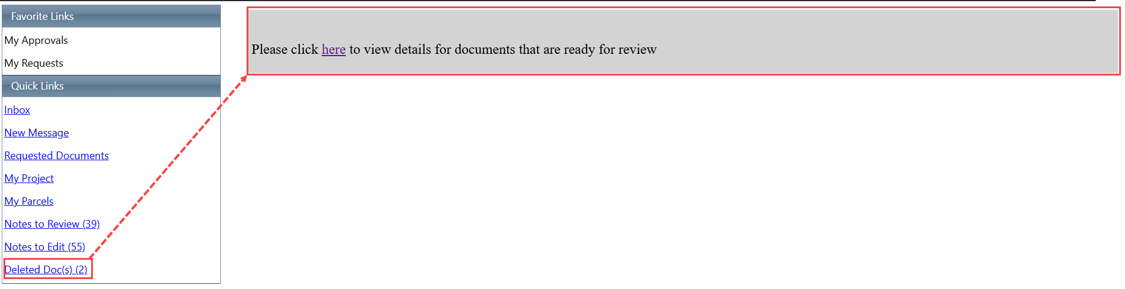
Deleted Doc(s) (Only ROW)
A list of deleted documents will be displayed
- Use the filters or dropdowns to select Agent(s) and Counties. After applying all filters, click Search.
- Select the checkbox next to the document(s) to confirm or deny delete.
- Click on the pdf icon to download the document(s)

FAQ/Troubleshooting:
Q: Why am I automatically redirected to My Dashboard after login?
A: This is the default landing page to provide quick access to your tasks, messages, and assignments.
Q: Why can’t I remove some messages from my Inbox?
A: Certain messages are linked to system actions and are automatically removed once the required action is completed.
Q: Where do rejected notes go after review?
A: Rejected notes appear under the Notes to Edit tab for correction and resubmission.
Q: How do I know if my message was acknowledged?
A: Enable the Need Acknowledgement option while sending the message to receive a notification once acknowledged.
Questions? Contact us!

Was this article helpful?
That’s Great!
Thank you for your feedback
Sorry! We couldn't be helpful
Thank you for your feedback
Feedback sent
We appreciate your effort and will try to fix the article