How to Export Ticket Summary to Excel Spreadsheet
Purpose/Overview
In this article, you will learn how to export tickets from Ticket Summary to a text file and then convert that file into an Excel spreadsheet. Exporting lets you work with ticket data outside the application. You can build reports, sort and filter the data, share it with customers or teammates, and keep records for review or auditing.
This feature is intended for agents and users who need to pull ticket information into a report on request, whether for all tickets in Ticket Summary or only a selected group.
Navigation Path:
To access this feature: Utilisphere > Tickets > Ticket Summary
Things to Know:
- Permissions: You need access to the Tickets menu and Ticket Summary. If the Exports options do not appear under “Select an action to perform,” contact your administrator to confirm your role permissions.
- Export location depends on volume:
- Exports of more than 250 tickets appear under Analytics > Exports.
- Exports of fewer than 250 tickets appear under Downloads.
- File format: The export is generated as a text file, not a native Excel file. You must import or convert it into Excel (steps below).
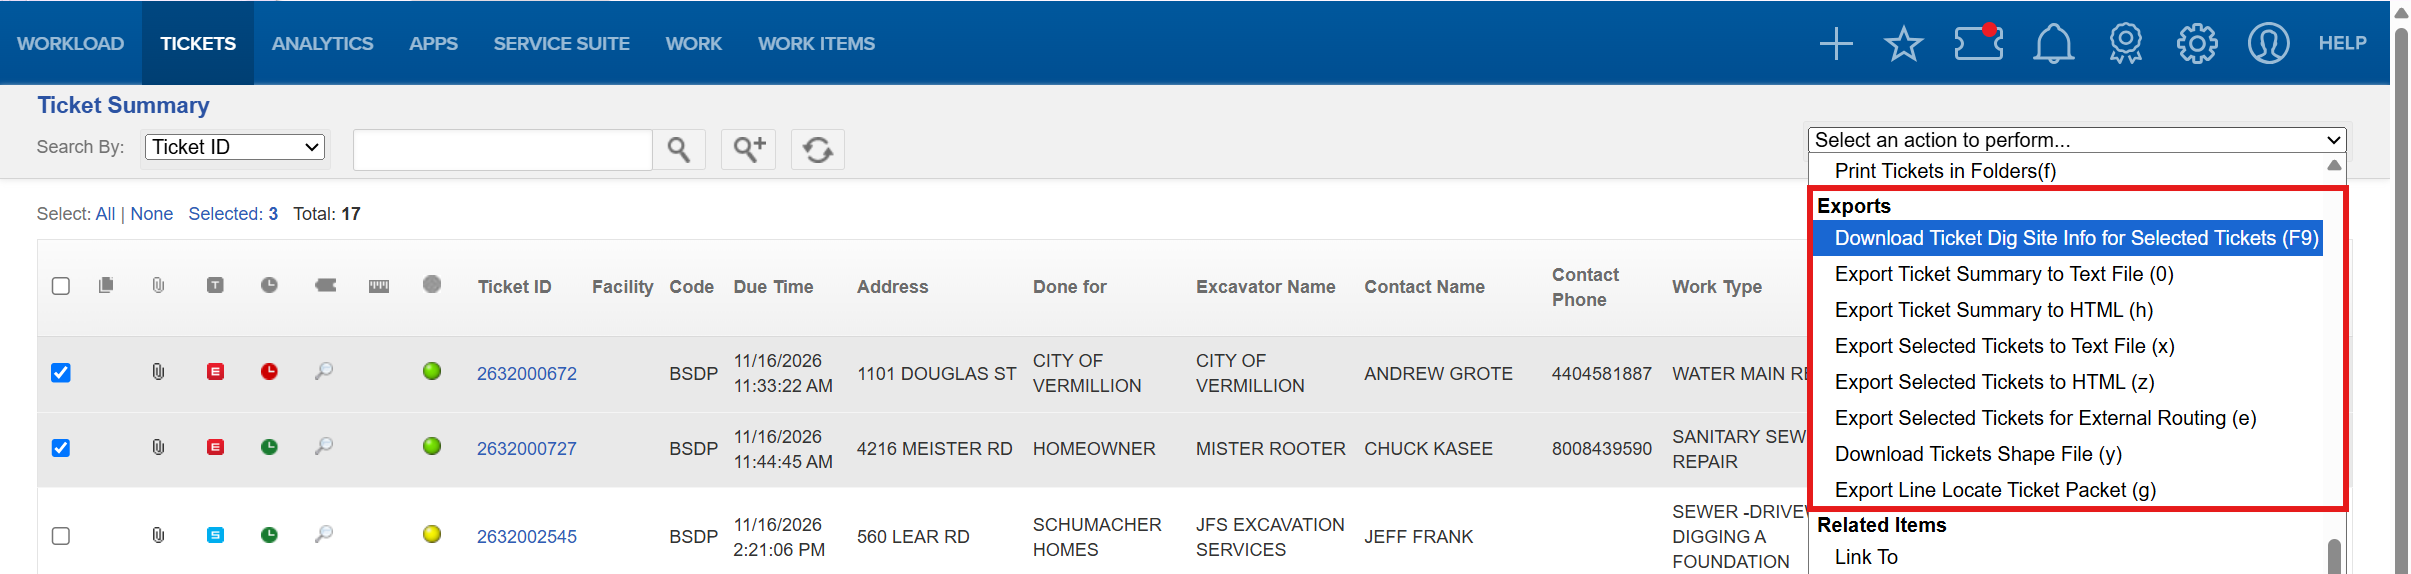
- Selection behavior: “Export Selected Tickets to Text File” exports only the tickets you checked. “Export Ticket Summary to Text File” exports all tickets in Ticket Summary.
- Software: The conversion steps require Microsoft Excel and a text editor such as Notepad. Menu names may vary slightly by Excel version.
Key Benefits/Use Cases:
- Customer report requests: A customer asks for a list of all their tickets. Export the full Ticket Summary and convert it to Excel to deliver a clean, shareable report quickly.
- Targeted review of specific tickets: A supervisor wants to review only certain tickets, such as those from one project or date range. Select just those tickets and export them, which saves time and avoids filtering unneeded data later.
- Trend analysis and record keeping: A team lead wants to sort, filter, or chart ticket data. Moving it into Excel enables analysis and creates a record outside the application.
How It Works:
Follow these steps to export tickets and convert them to an Excel spreadsheet.
Export the Tickets
- On the Navigation Menu, click Tickets > Ticket Summary.
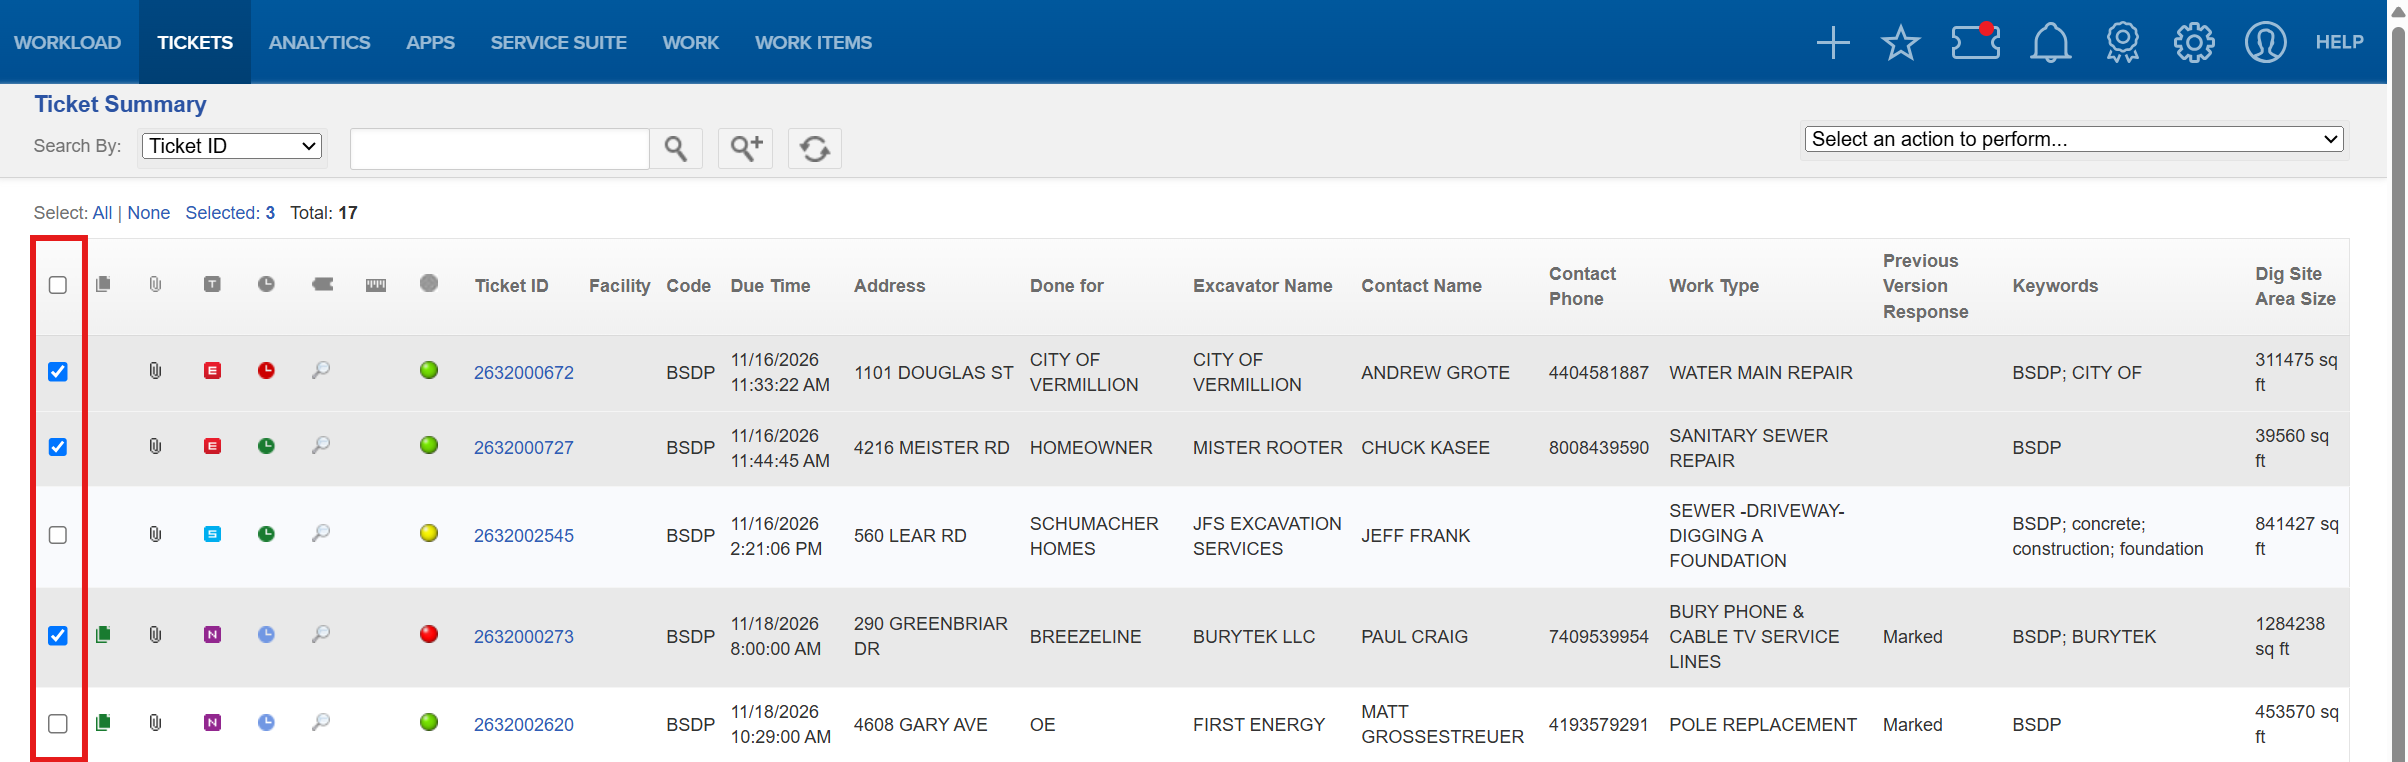
- On the Ticket Summary screen, check the box in front of each ticket number you want to include. To include all tickets, select the All option.
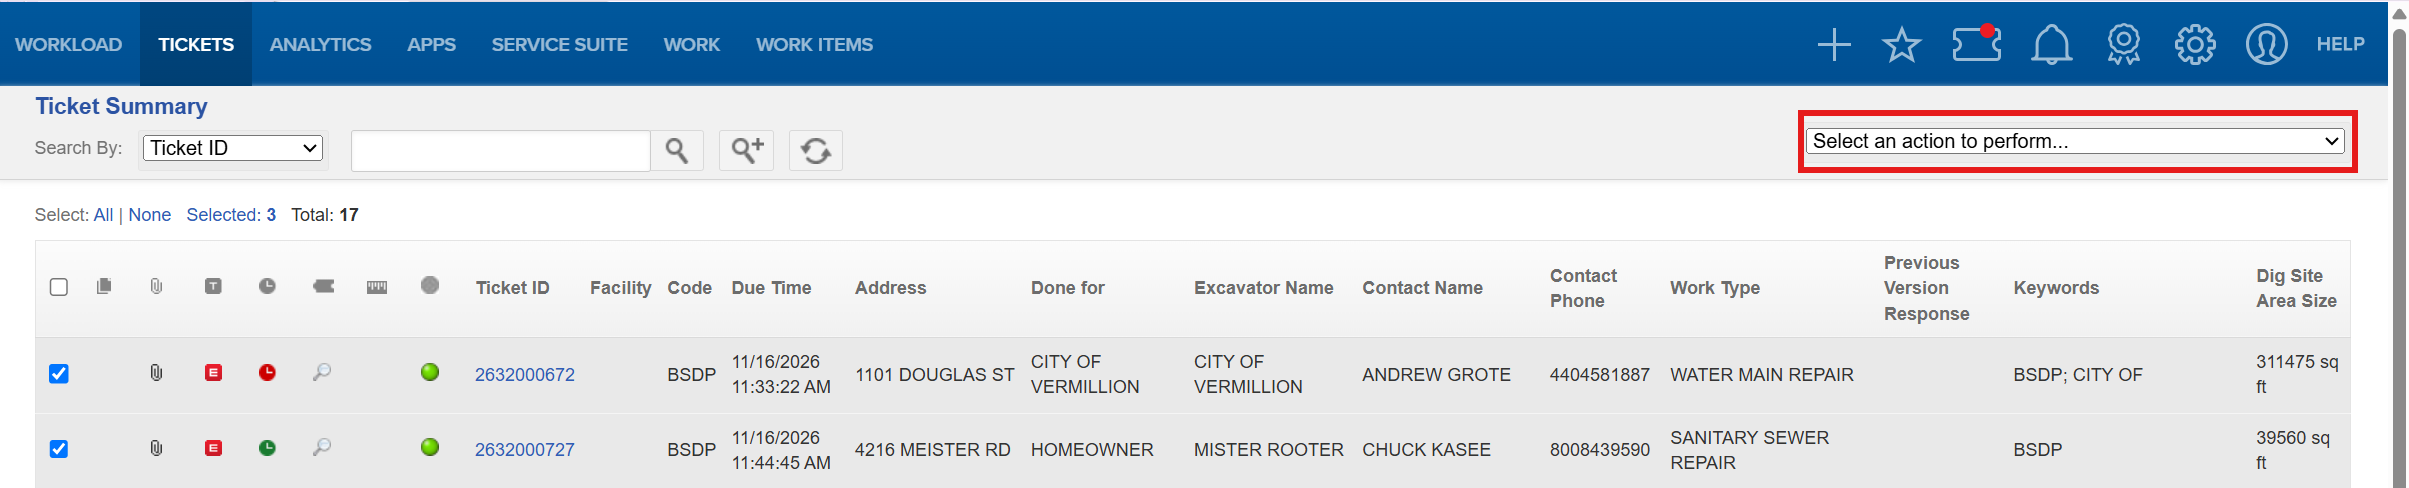
- Click Select an action to perform.
- Choose an export option.
- Locate the exported file.
- More than 250 tickets: Analytics > Exports

- Fewer than 250 tickets: Downloads
- More than 250 tickets: Analytics > Exports
Convert the Text File to an Excel Spreadsheet
Option A: Import the text file (recommended)
- Open Excel, click New, then click Blank Workbook.

- From the menu, select Data.

- Under Data, select From Text/CSV.

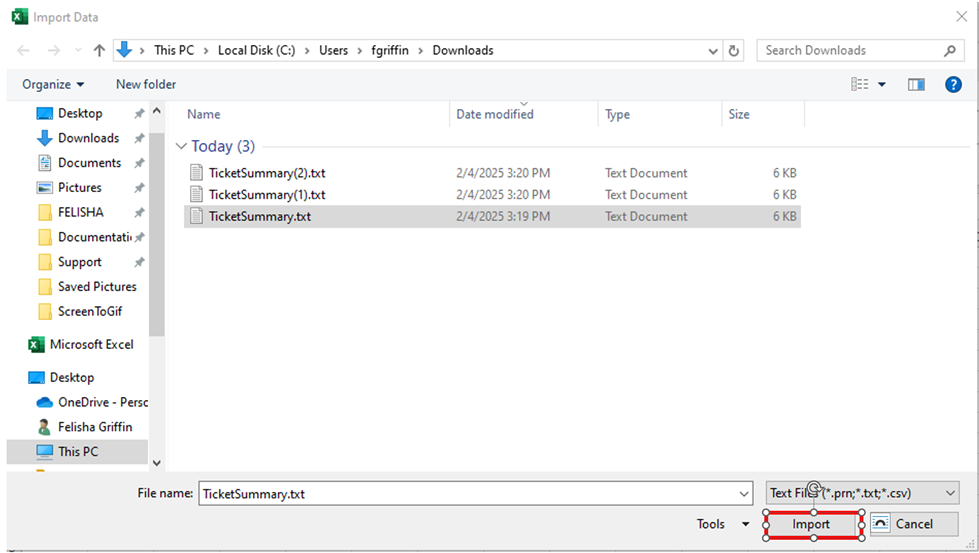
- Browse to and select the exported text file, then click Import.
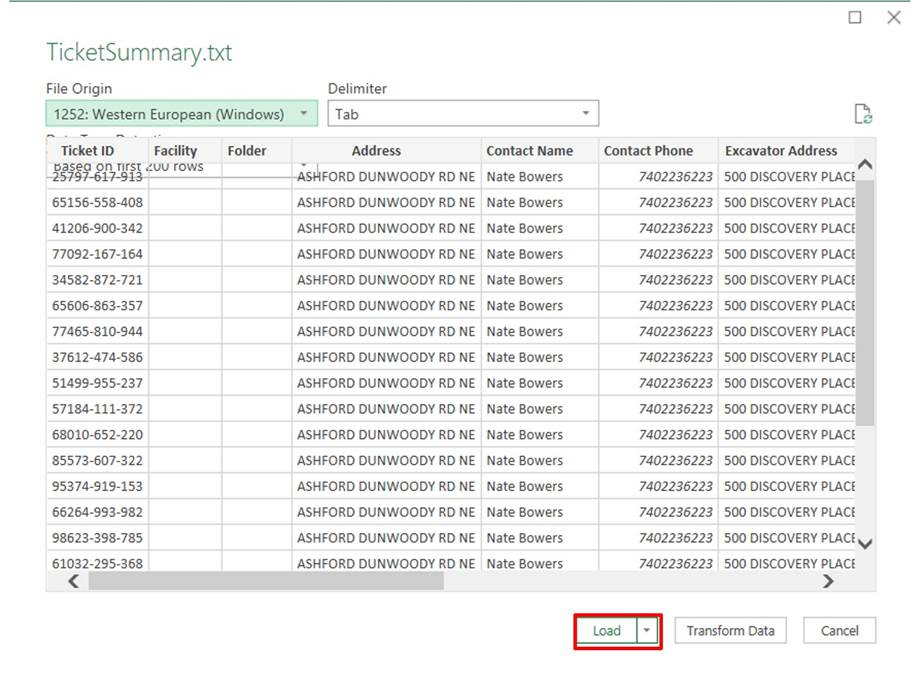
- Load the data. The text file contents appear in a preview. Click Load to convert the data into an Excel spreadsheet.
Option B: Copy and paste
- Open the text file.
- Under the Edit menu, select Select All (Ctrl+A).
- Under the Edit menu, select Copy (Ctrl+C).
- Open a blank Excel workbook and press Ctrl+V to paste the data.
FAQ/Troubleshooting:
Q: Where do I find my exported file?
A: If you exported more than 250 tickets, go to Analytics > Exports. If you exported fewer than 250 tickets, check Downloads.
Q: What is the difference between “Export Ticket Summary to Text File” and “Export Selected Tickets to Text File”?
A: The first exports every ticket in Ticket Summary. The second exports only the tickets you checked. Use the second option when the customer wants a specific set of tickets.
Q: Can I export all tickets without checking each box?
A: Yes. Select the All option on the Ticket Summary screen, or choose Export Ticket Summary to Text File to export everything.
Q: Why is my export file a text file instead of an Excel file?
A: The export is generated as a text file. Use Excel’s Data > From Text/CSV import, or copy and paste the contents into a blank workbook, to convert it.
Q: The data looks jumbled after I pasted it into Excel. What should I do?
A: Use the import method (Data > From Text/CSV > Import > Load) instead of pasting. The import preview lets Excel separate the data into columns correctly.
Q: I don’t see the Exports options under “Select an action to perform.”
A: Make sure you are on the Ticket Summary screen. If the options are still missing, your role may not have export permissions. Contact your administrator.
Questions? Contact us!

Was this article helpful?
That’s Great!
Thank you for your feedback
Sorry! We couldn't be helpful
Thank you for your feedback
Feedback sent
We appreciate your effort and will try to fix the article